
This 10-step tutorial will show you how to make a homemade owl card from start to finish. This greeting card is for all the teachers, mentors, and loved ones who have made a difference. If you are heading back to school or want to thank someone for their influence in your life, this is the card to make.

Owls are a symbol of wisdom and learning. There are so many ways to design them when crafting by paper. In this tutorial, we wanted to describe how we put this homemade owl card together.
For this card, we used a 5 x 7 inch card and a 4 x 6 cardstock for the background.
Step 1. We first made and assembled different parts of the owl’s body. From our stash of scrapbook paper and card stock scraps, we found some interesting patterns of paper to use. We also used circle paper punches of various diameters. If you don’t have circle paper punches, use stencils or trace around household circular objects at home. Here’s what we needed:
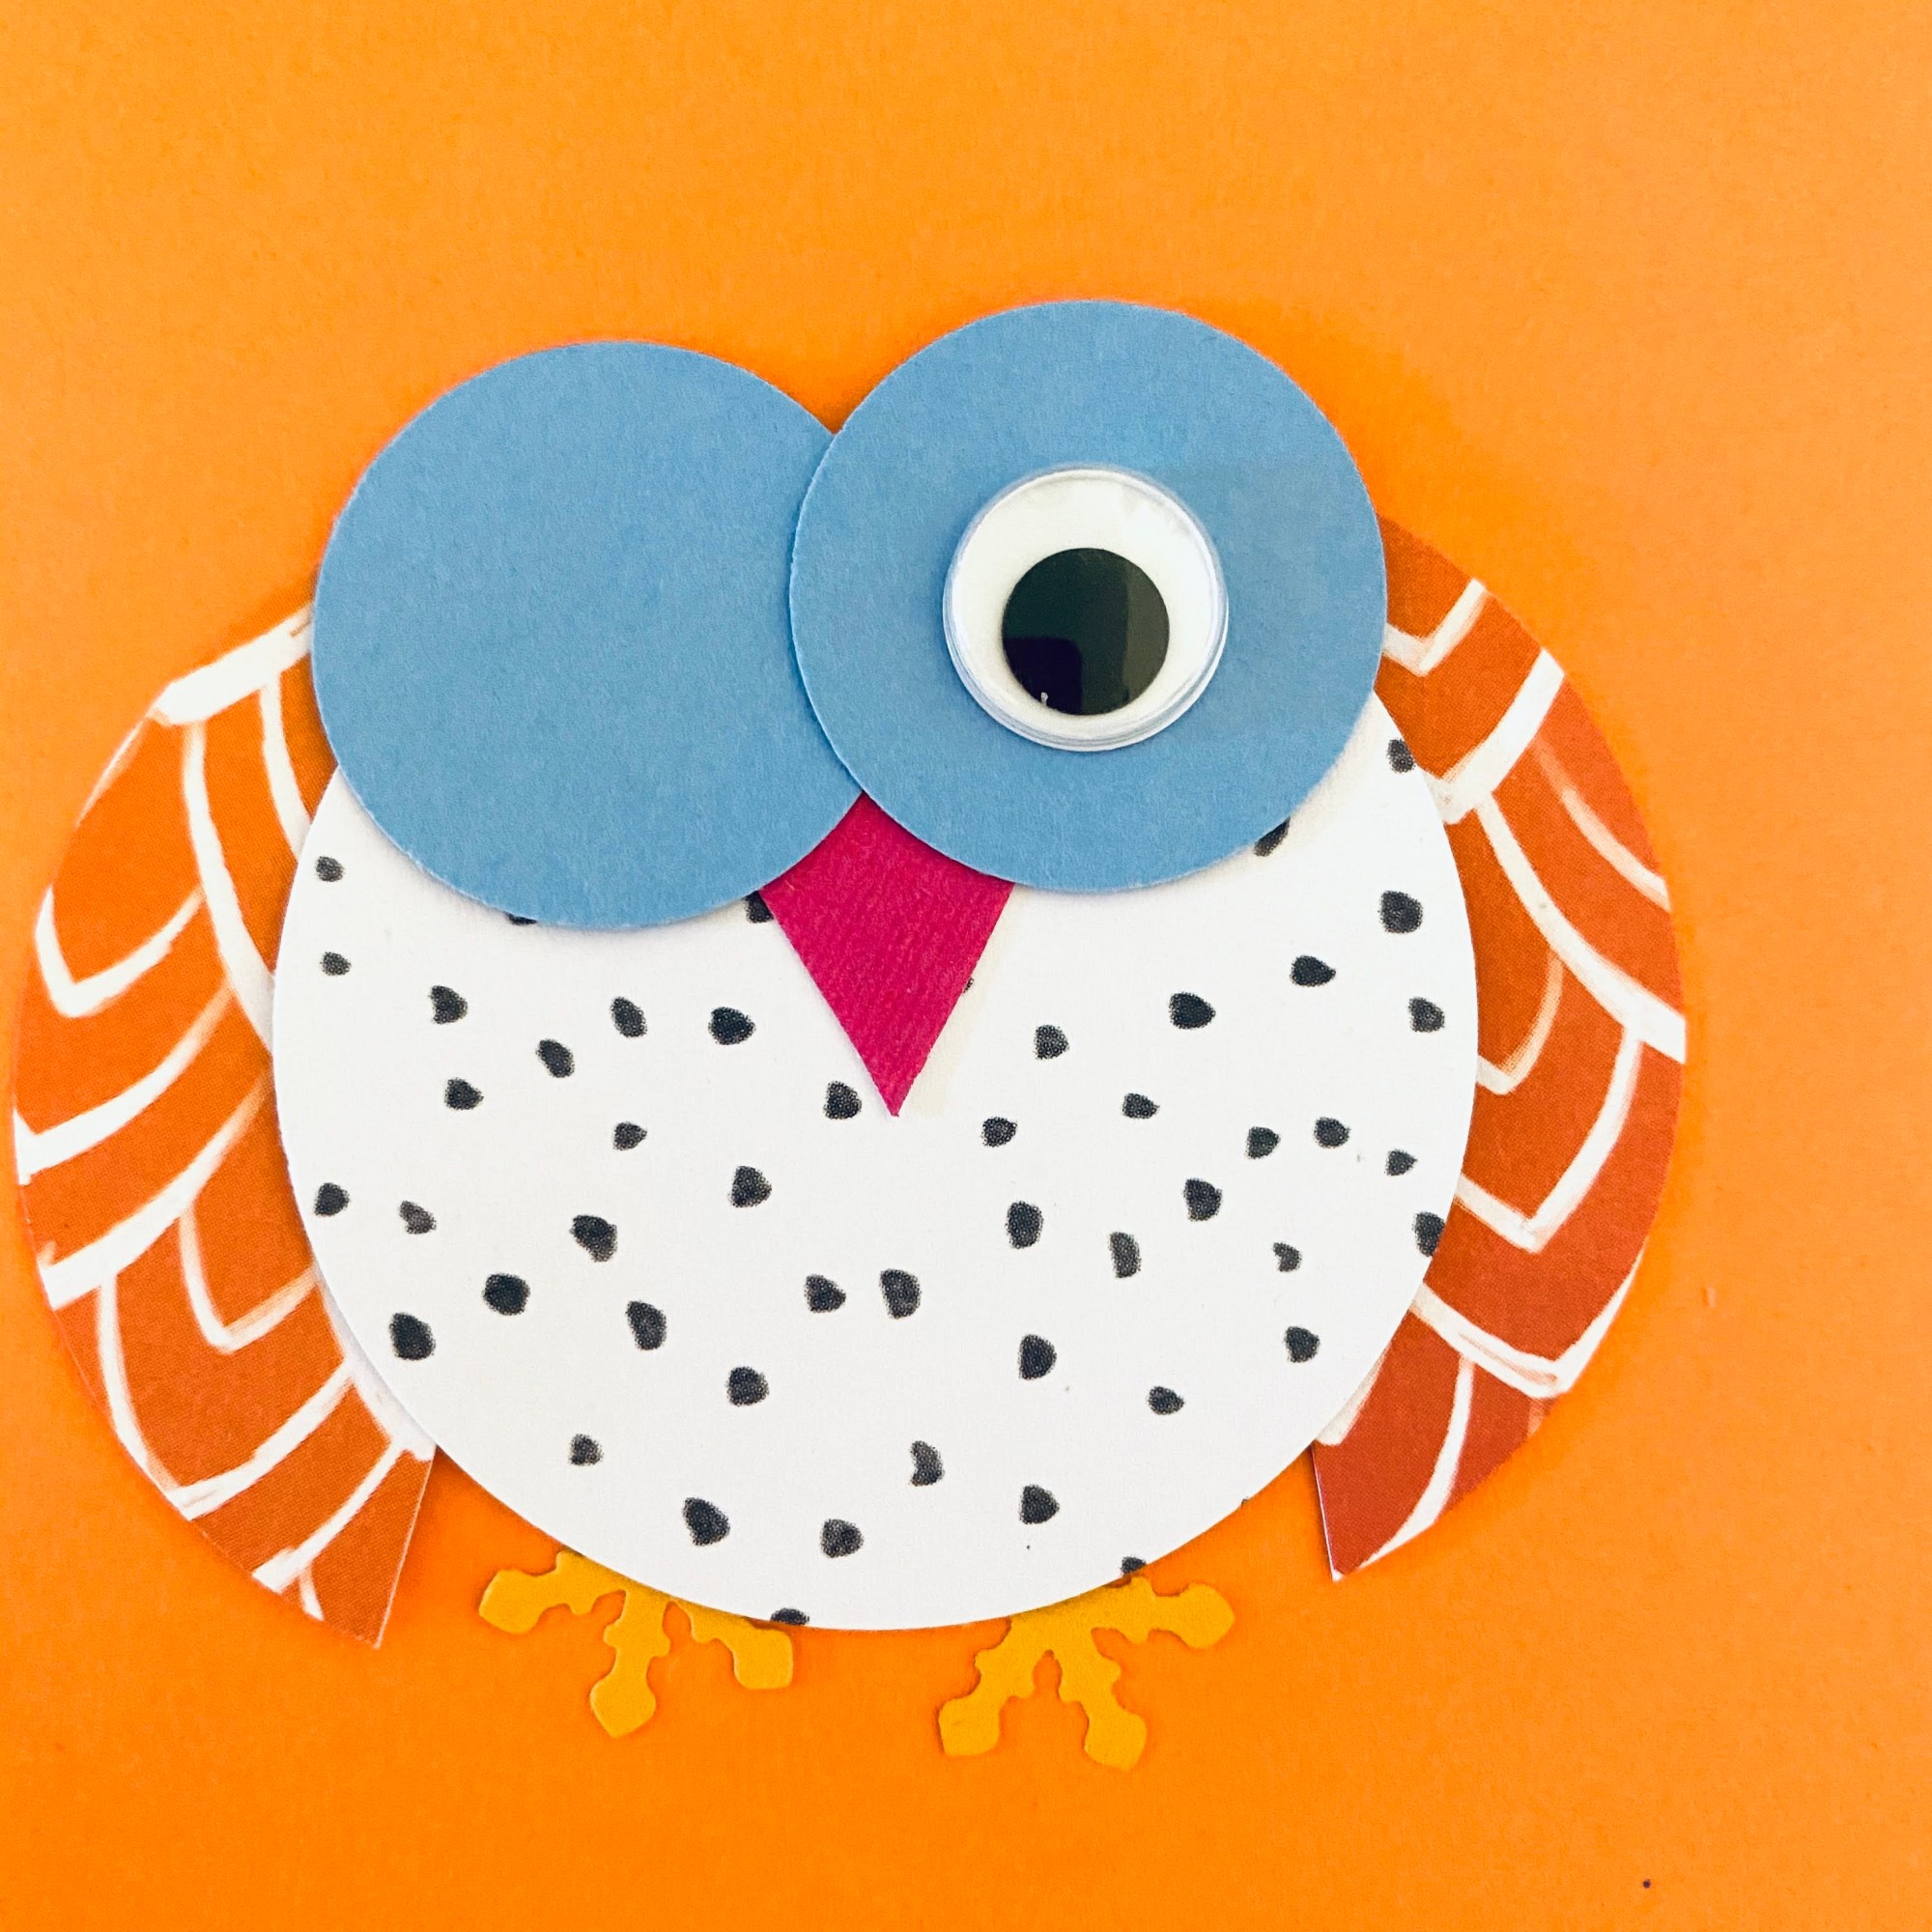
- 1 circle (2 inches in diameter) for the owl’s body. We used a dotted pattern paper for this.
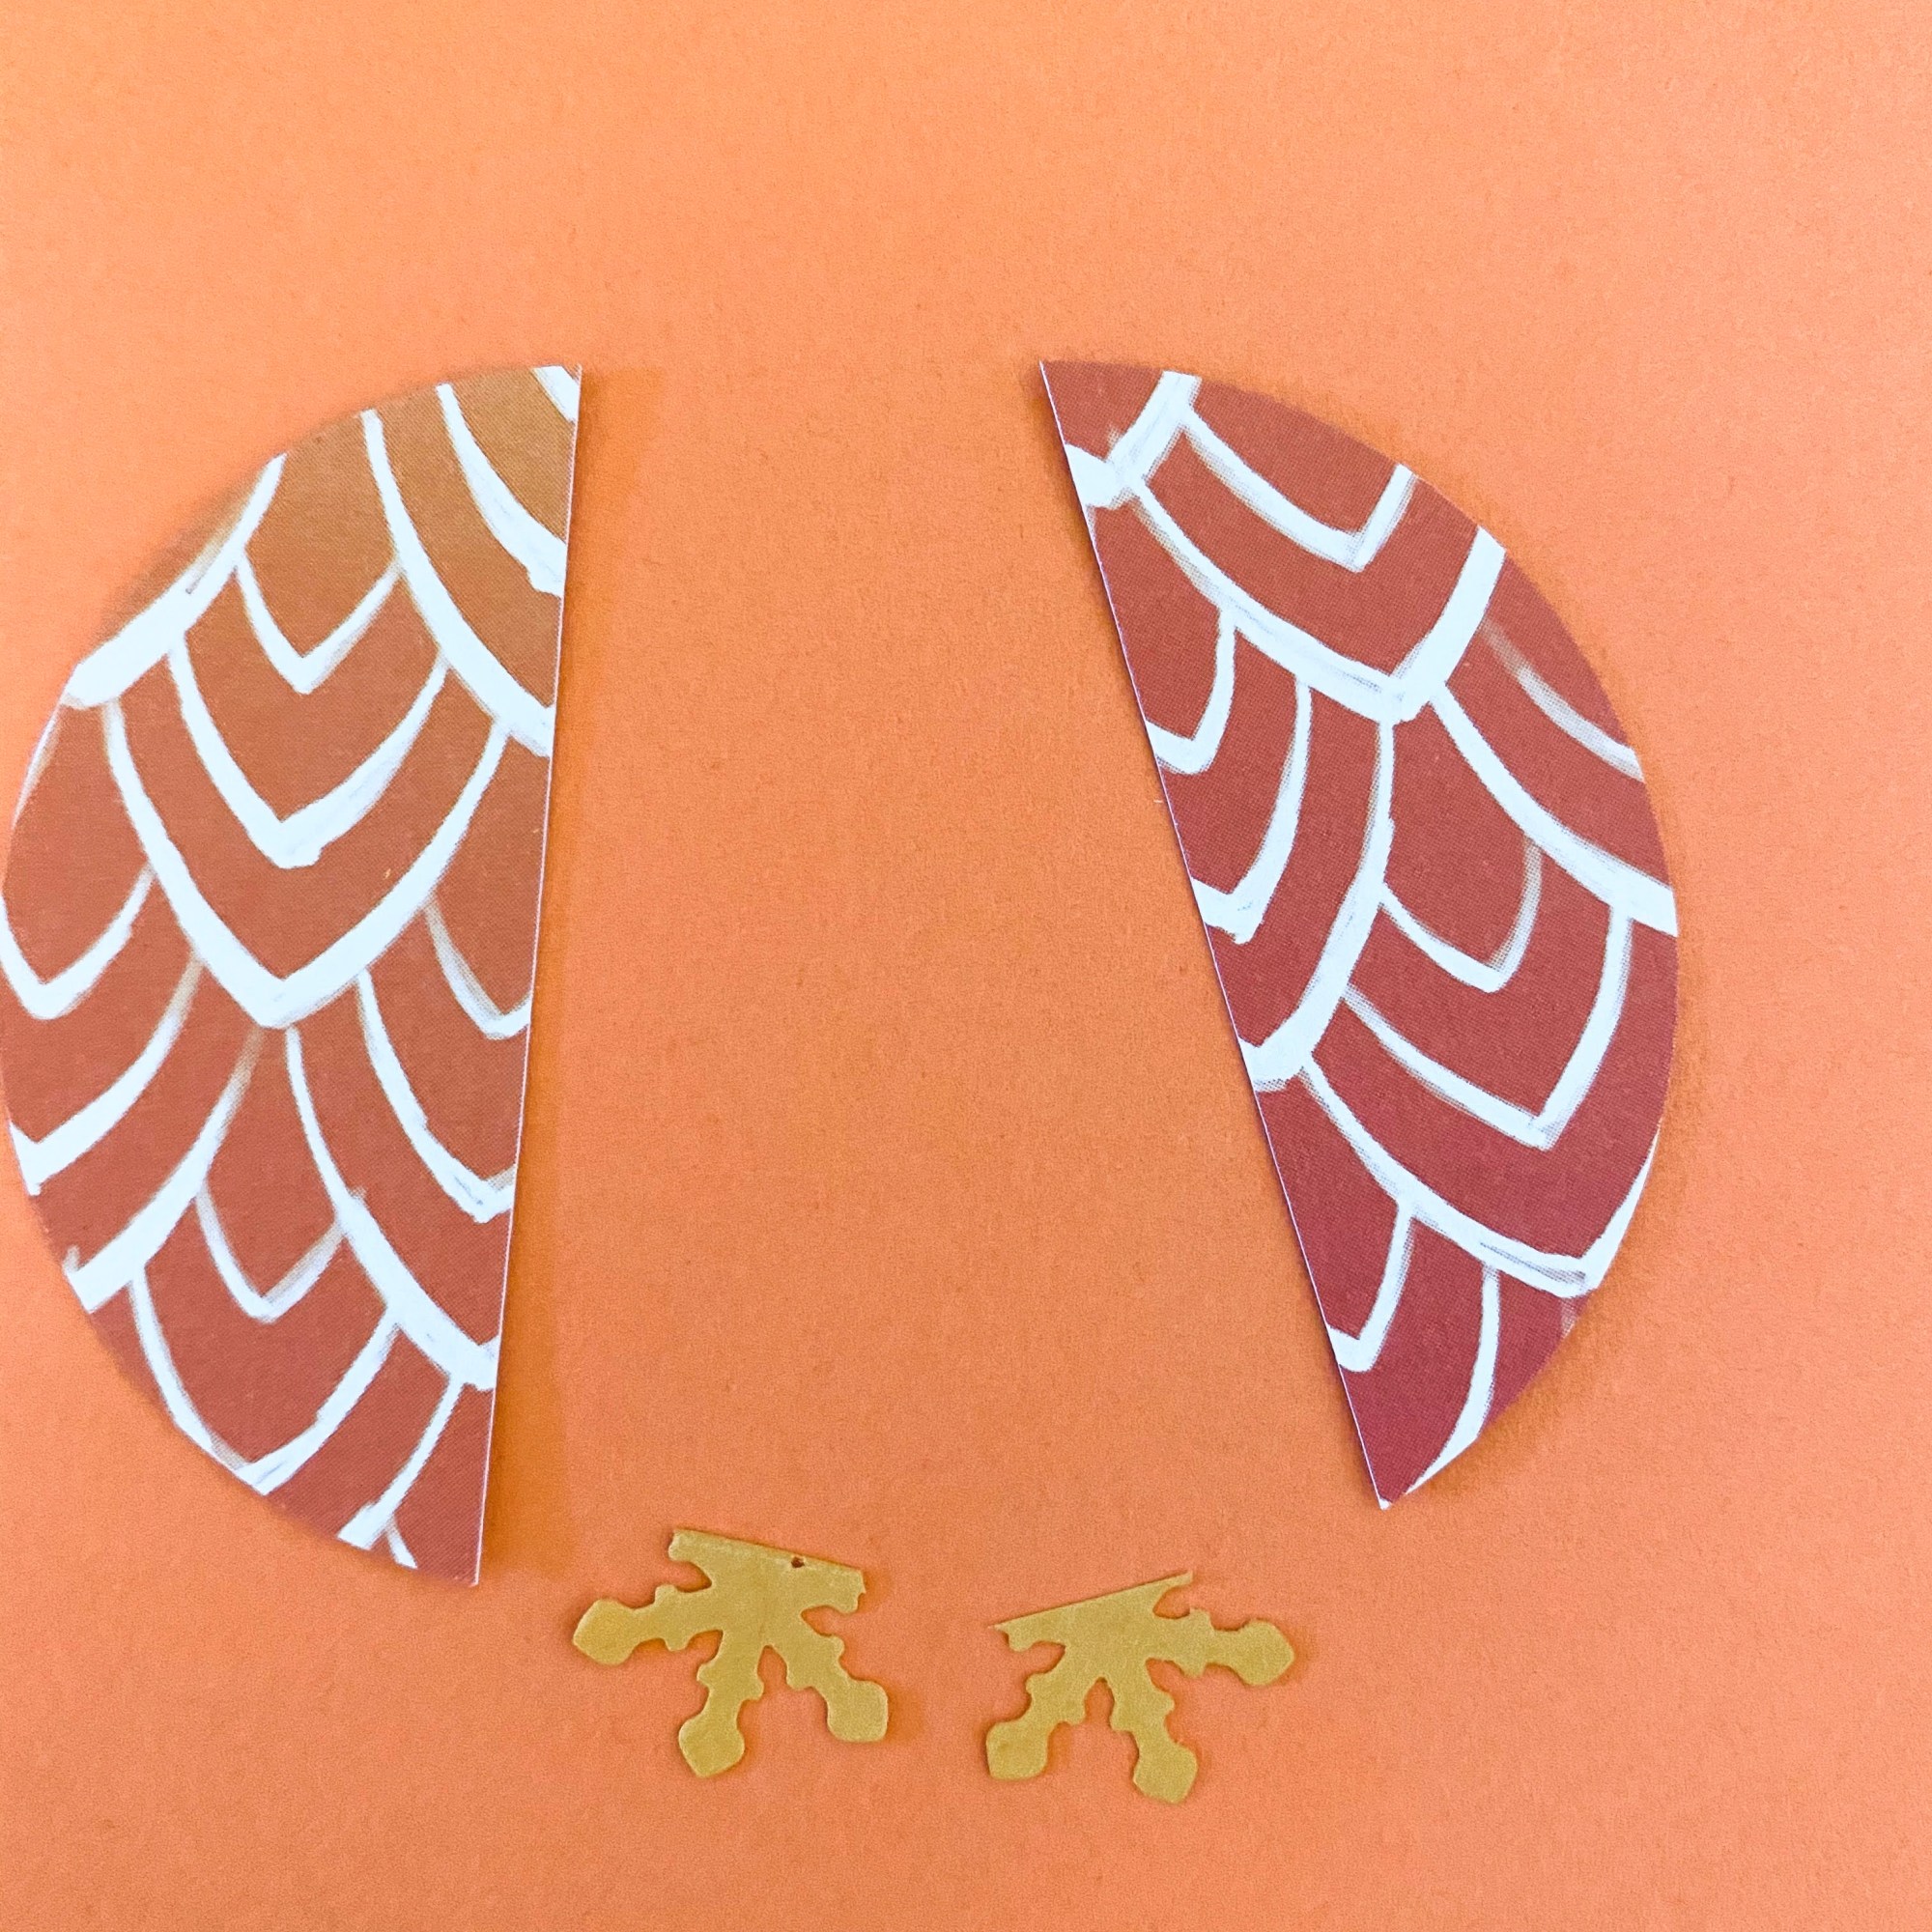
- 1 circle (2 inches in diameter) for the owl’s wings. We used orange patterned paper that looked like abstract feathers. We cut this particular circle in half to make two wings.
- 2 small circles (each circle should be 1 inch in diameter). We used blue paper for this. These circles will be the backdrop to the eyes.
- Finally, we cut out a small triangle out of a dark magenta paper for the beak.
Take a look at some of these shapes below:

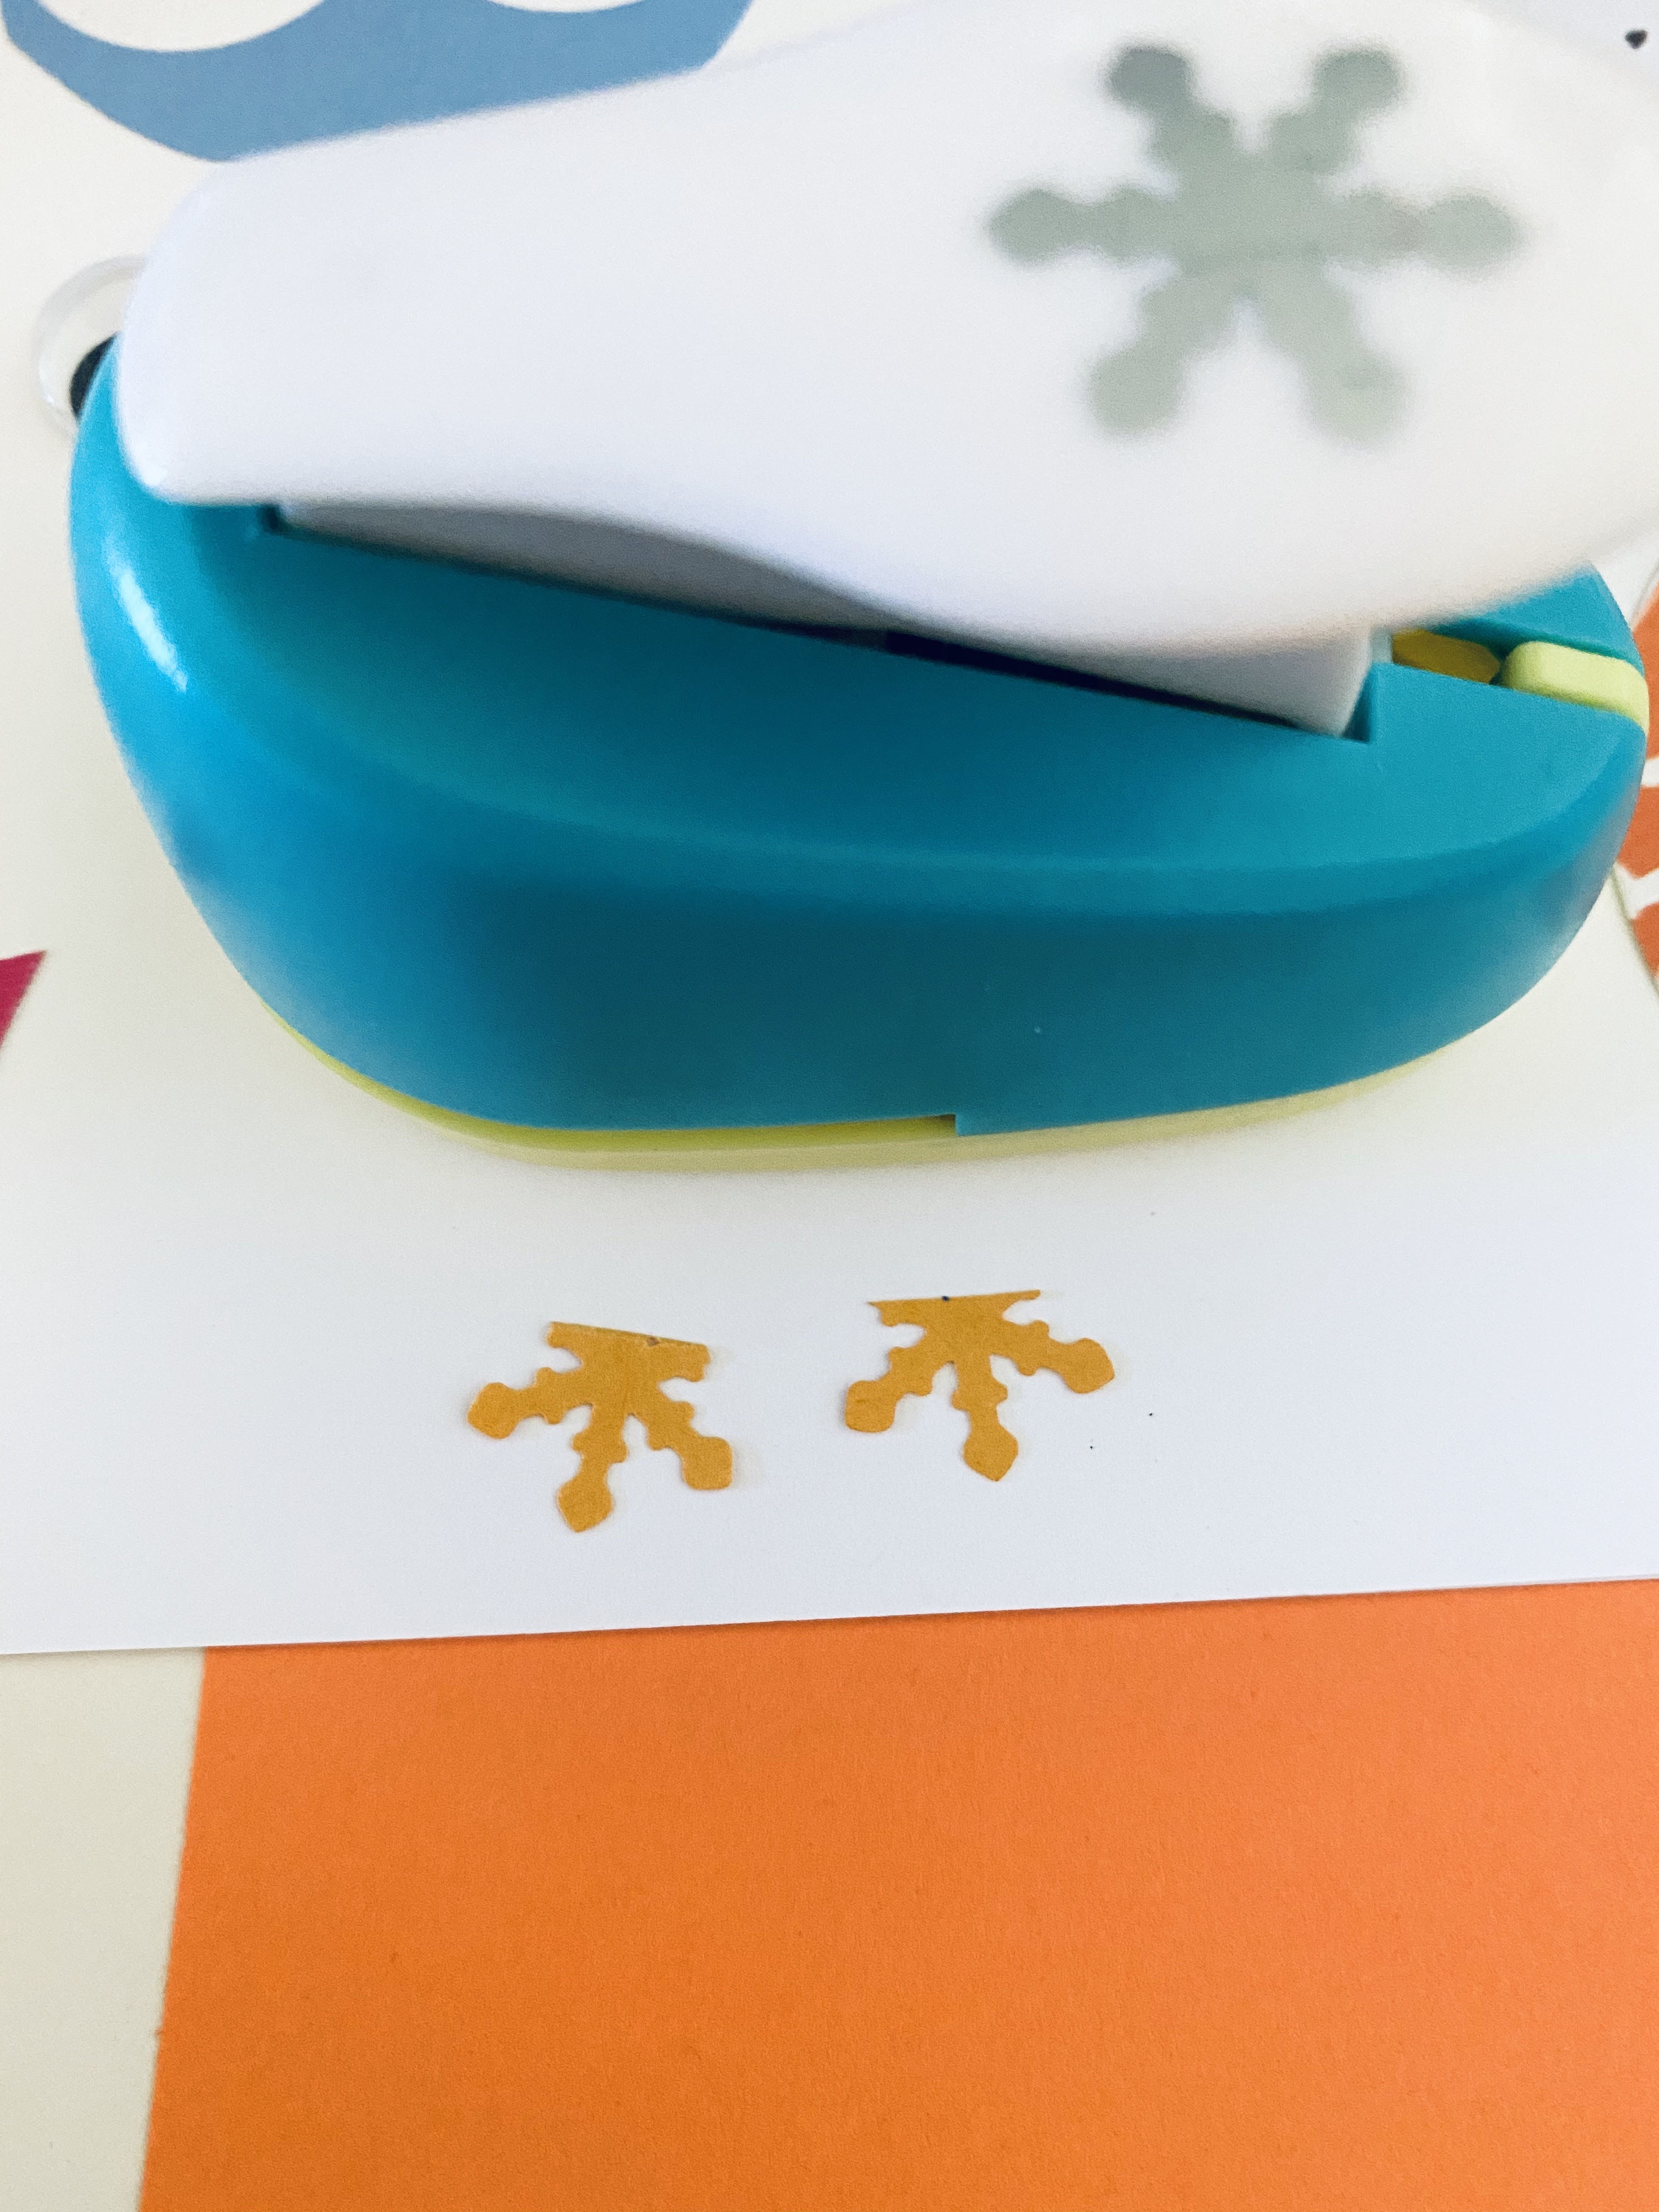
Step 2: Next, we made the owl’s feet (or rather, talons). We decided to take a unique approach to the talons. We aren’t owl experts, but we read that certain owls can turn their talons so that only 2 or 3 are front-facing. Cool fact. To make the talons, we decided to use a snowflake punch from our craft stash. We found one small snowflake that looked like talons. We punched two snowflakes and cut each of them slightly in half (or slightly more than half). You need to have a little more than half of a snowflake so you can glue that part behind the body of the owl. See the pictures for reference. If you do not have a snowflake punch, you can also use star punches, three triangles or simply draw and cut them out. Get creative with it!
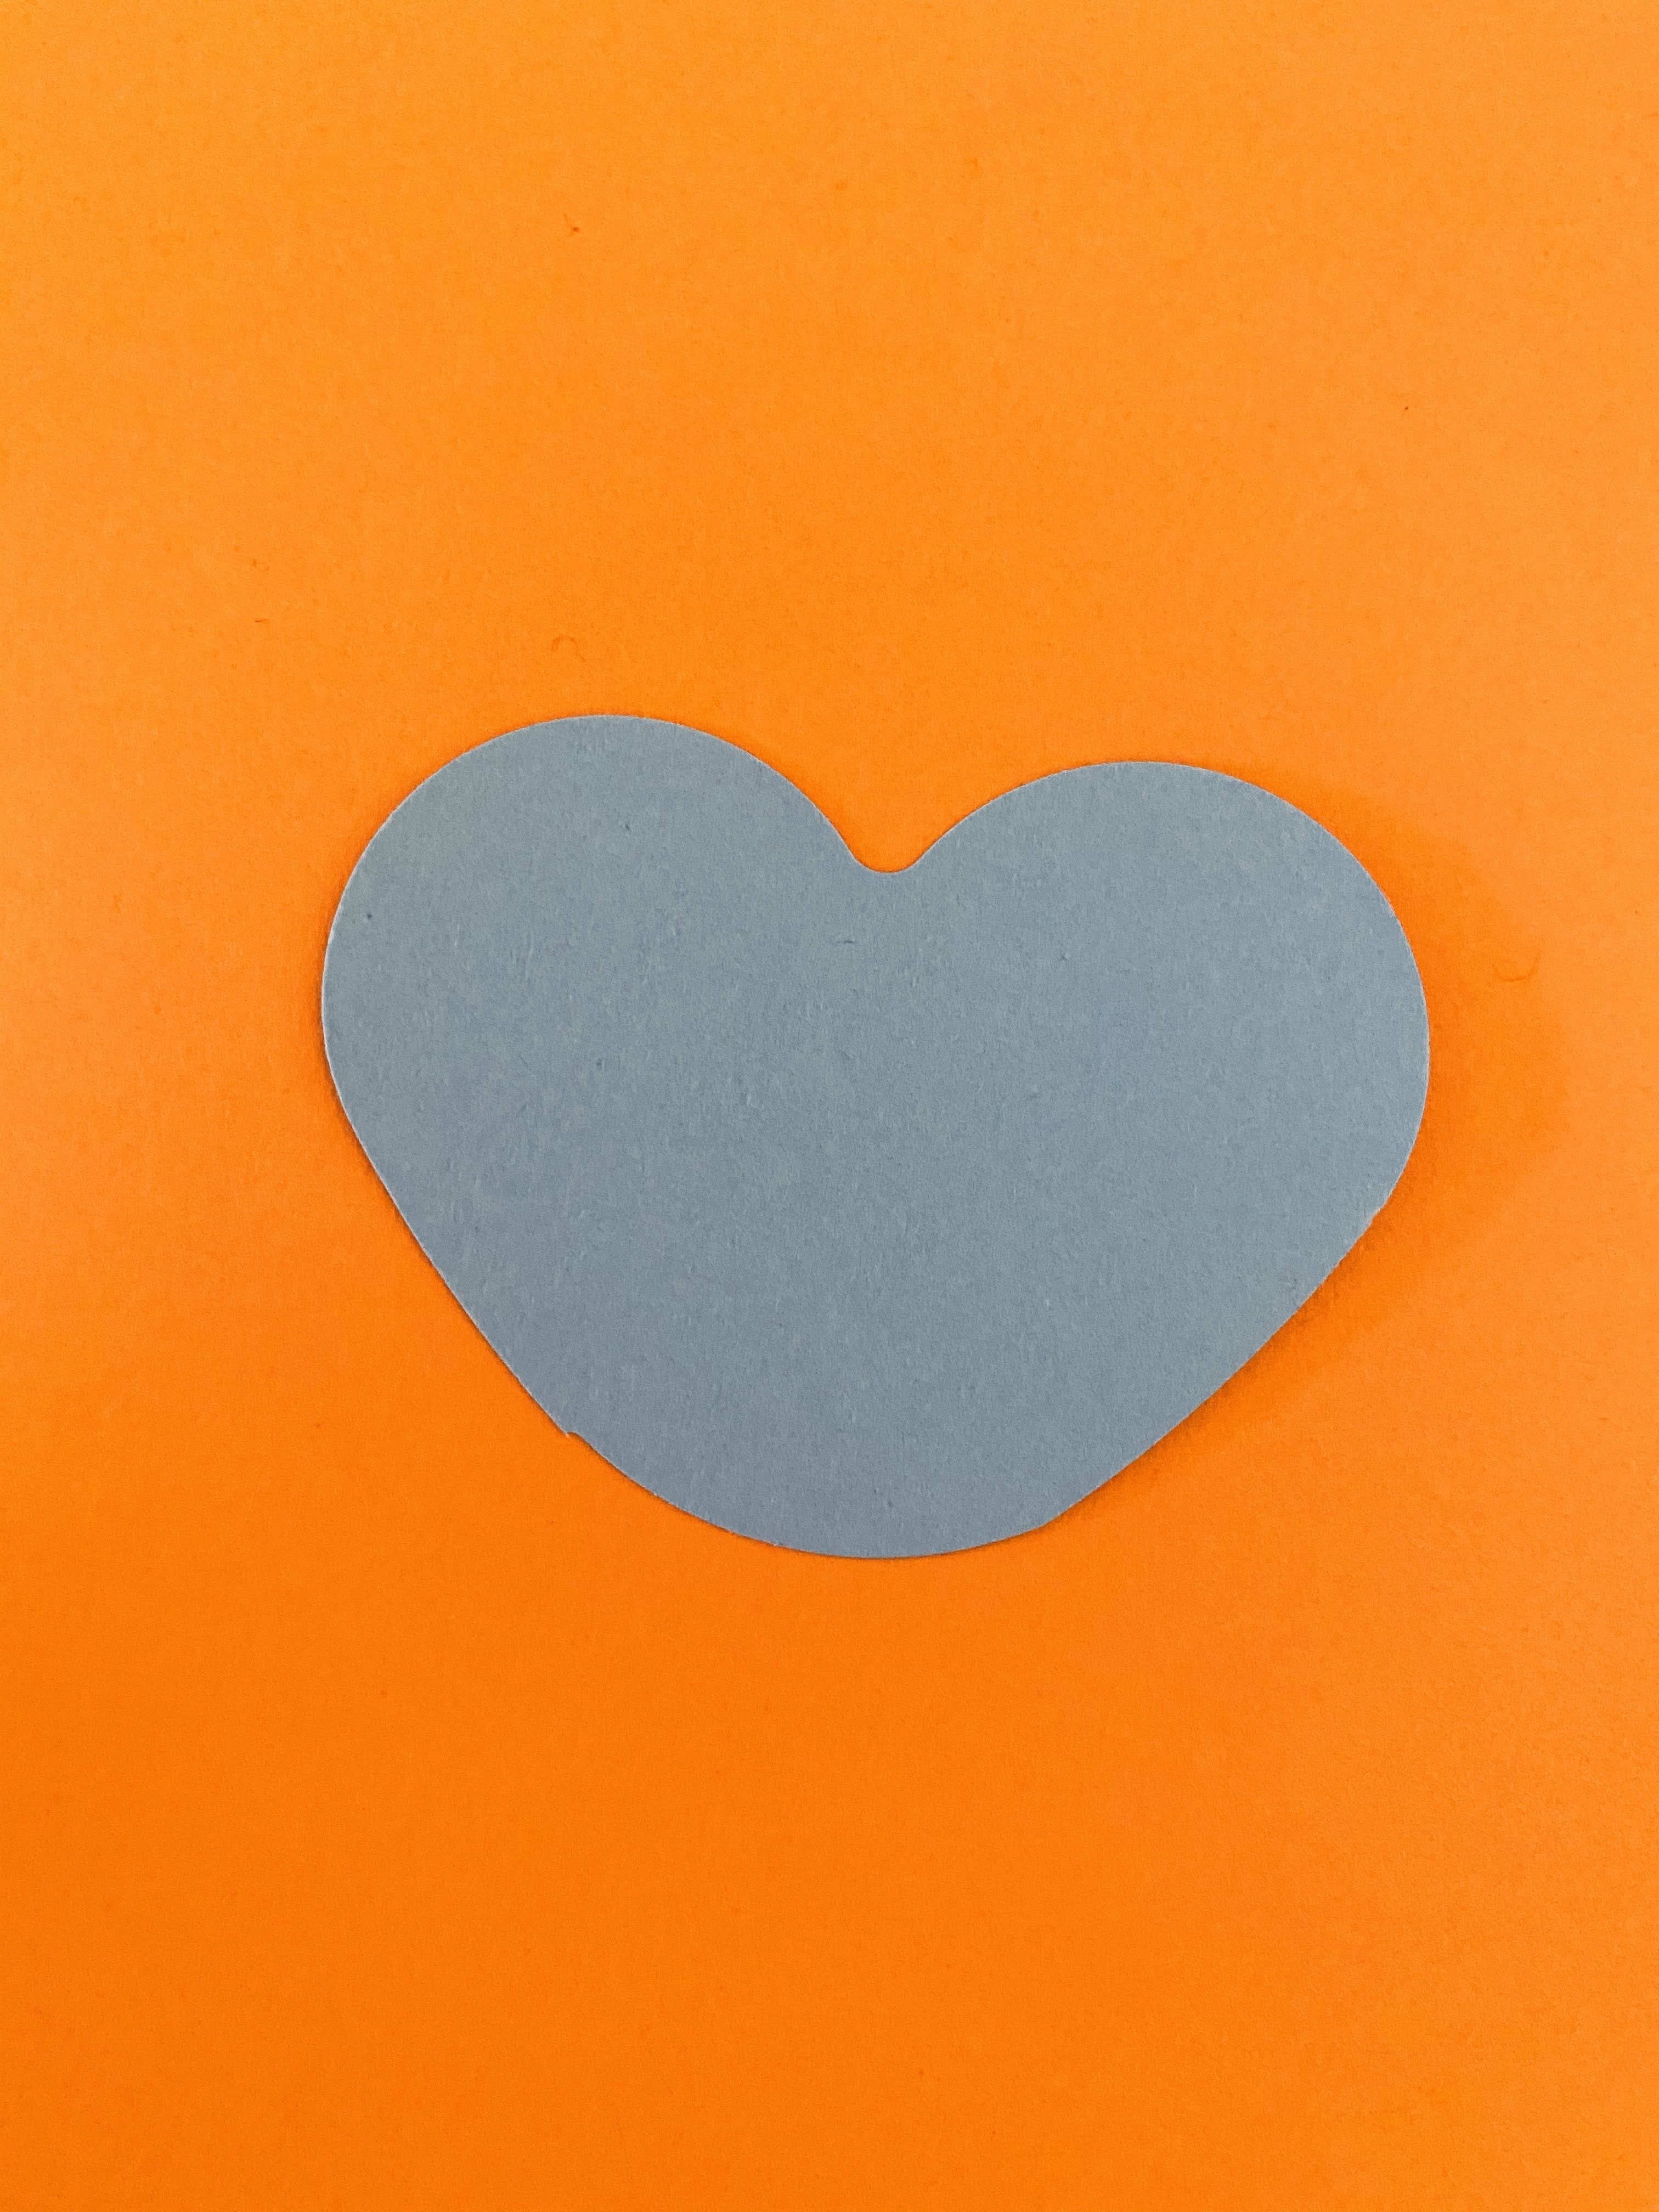
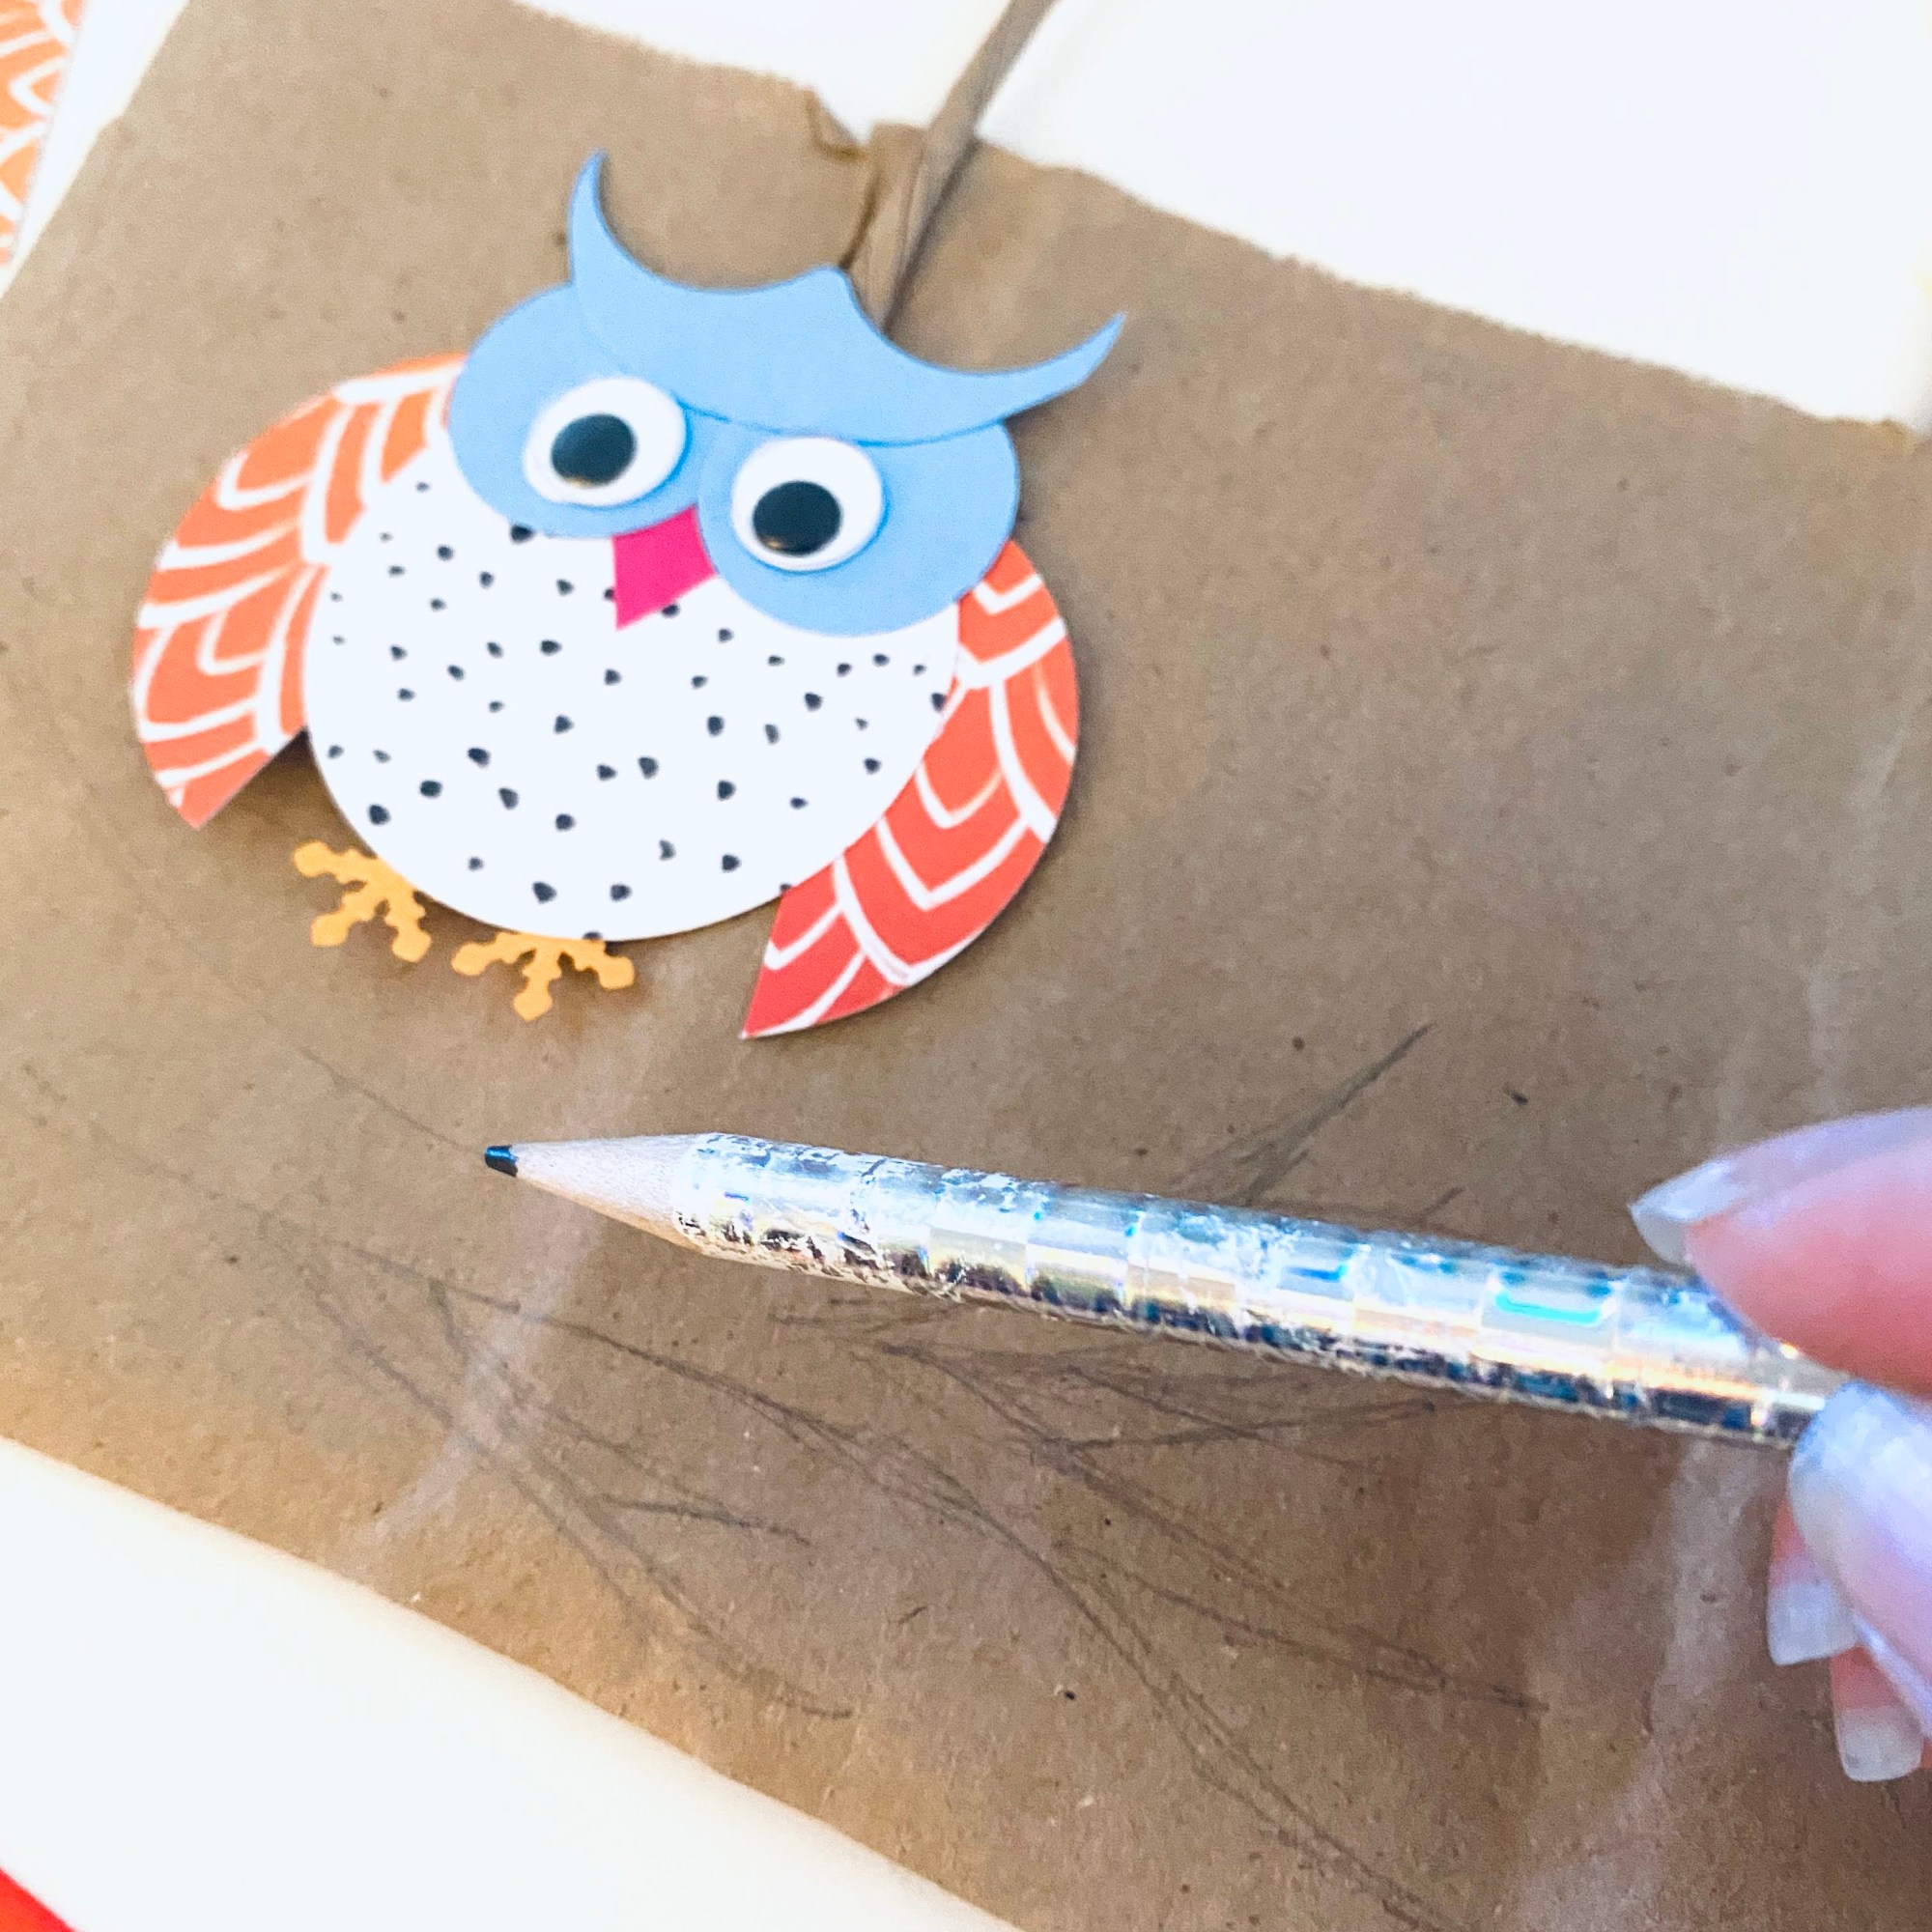
Step 3: In this step, we stumbled upon a unique way to shape the owl’s “ear tufts”. When we were trying to figure out how to design our owl, we were playing with the idea of making a heart face for the owl. We kept cutting away, and eventually we decided to use the left over scraps as feathery ear tufts instead. Certain owls have ear tuffs which are feathers on top of their head that look like they could be ears. But these feathers are not ears.
It worked out in the end. Really, we think you can just cut this shape out because it looks like a crescent moon with a “nose.” But if you are really curious as to how we ended up with this shape, see our steps below.
- First we punched out a 2 inch heart.
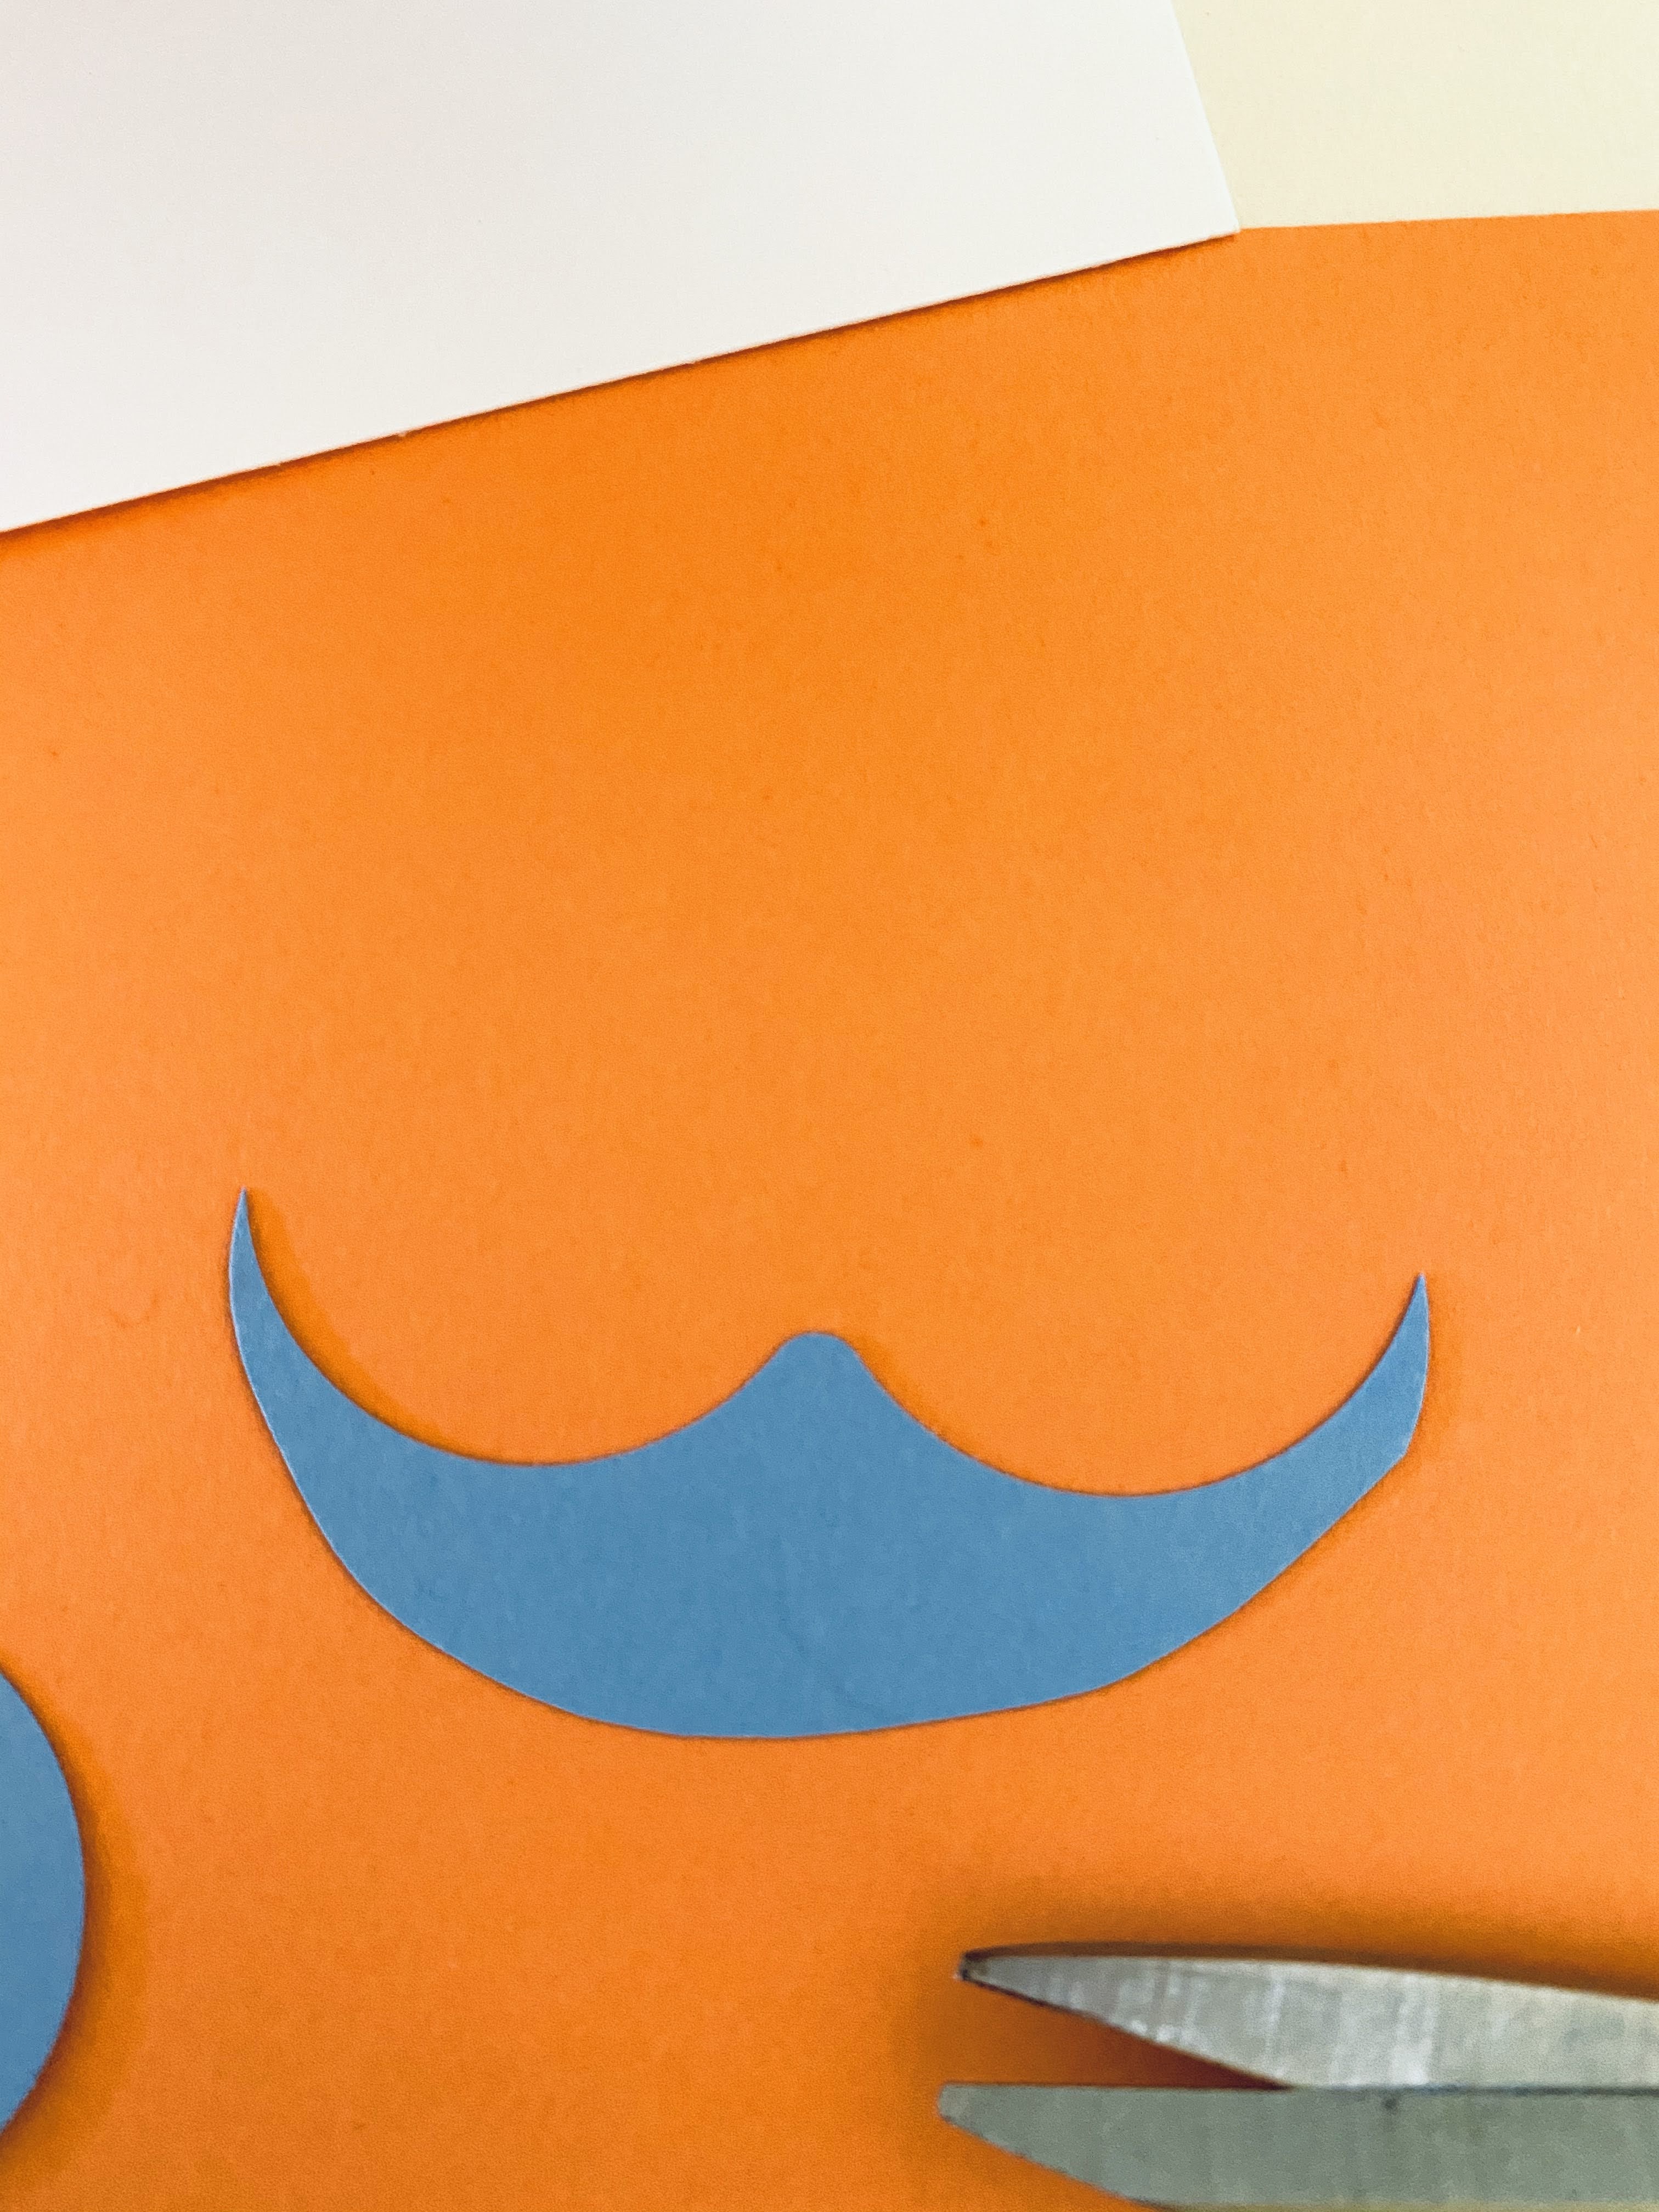
- Second we rounded out the bottom of the heart using scissors.
- Third we decided to further sever the top of the heart from its bottom by carving out the top portion of the heart out so it looked like a peanut or sunglasses or the number eight.
- The result: What was once the bottom of the heart now looks like a crescent moon shape. Or a mustache. However you look at it, we used it as ear tufts.
I guess our love of experimenting with paper punches was worth it! However, like we said, you can simply look at this shape and then draw and cut it out. It does not need to be symmetrical. In fact, that may add to the uniqueness to your owl!


Step 4: Once we cut or punched out all the pieces of the owl, it was time to assemble and glue it together.
- Lay out the feet.
- Lay out the wings.
- Glue the 2 inch circle body on top of the wings and feet.
- Next, it was time to arrange the owl’s face. Add the beak on the body. Also arrange and and lay the 1 inch circles next to each other on the body. Lay out the eyes. We used googly eyes. Once you are satisfied with placement, glue it all together on the body.
- Arrange the owl’s feathery ear tufts on top of the owl’s head and eyes. Once you are okay with the arrangement, glue it on.


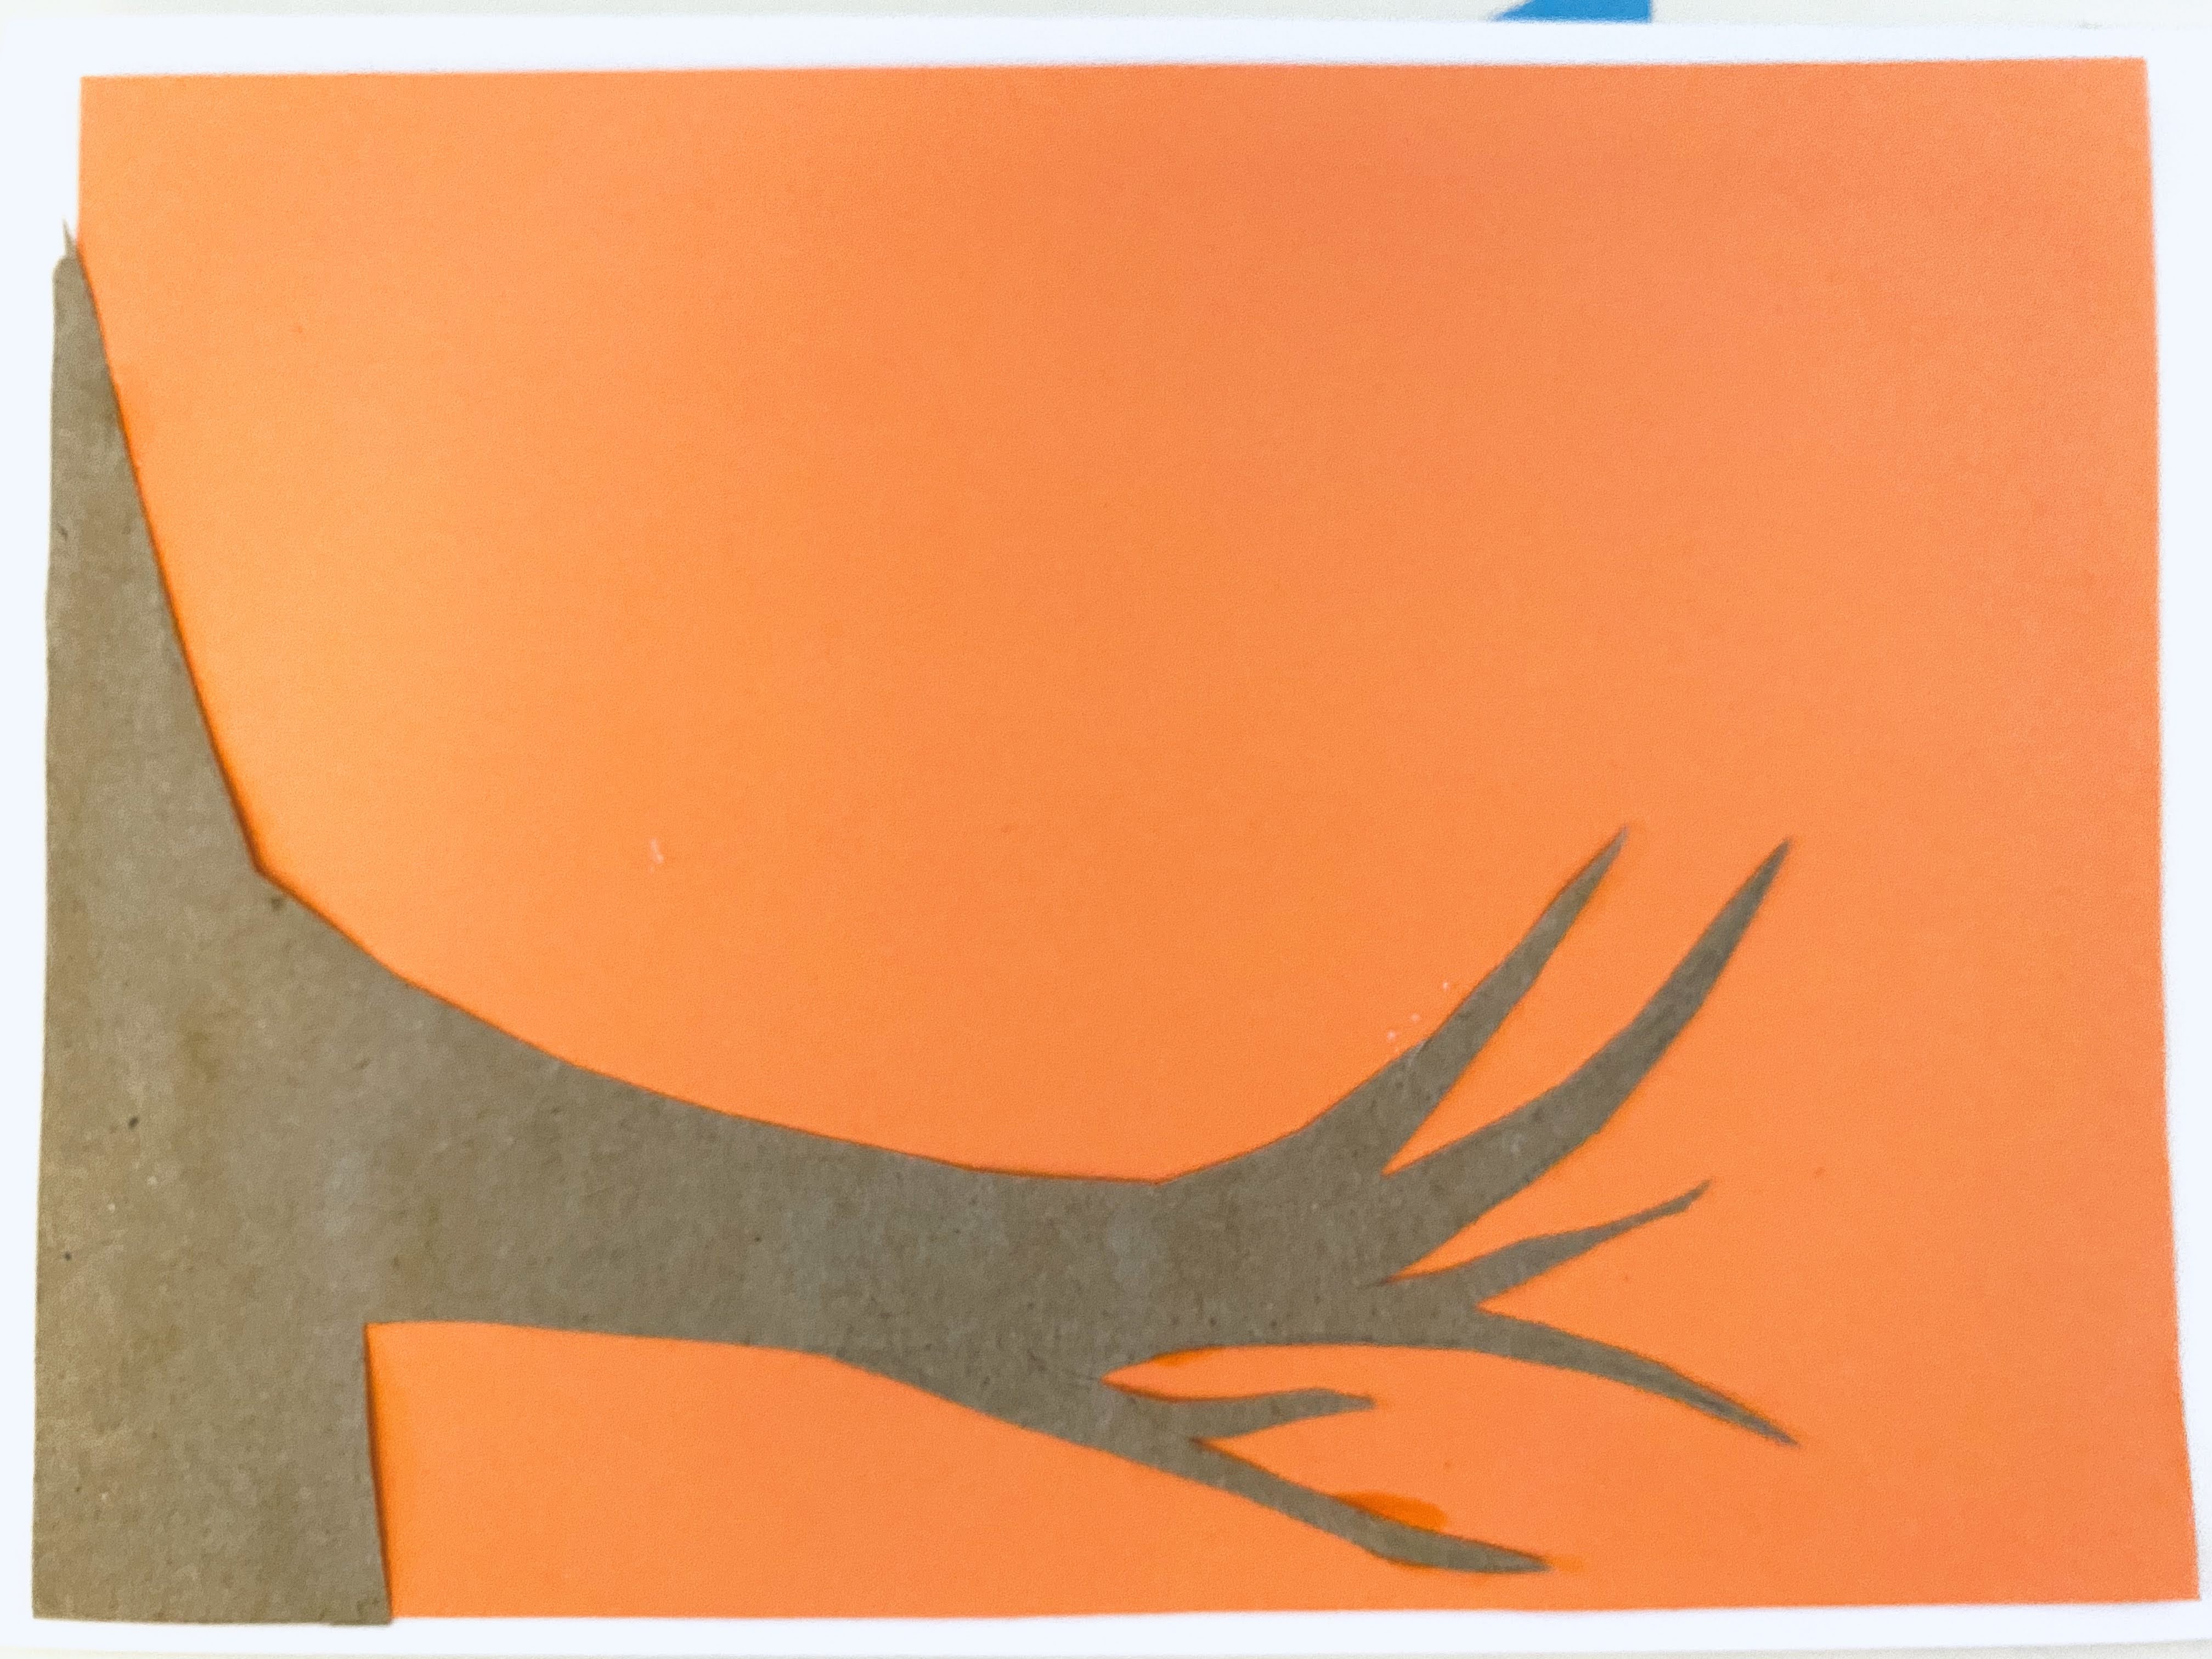
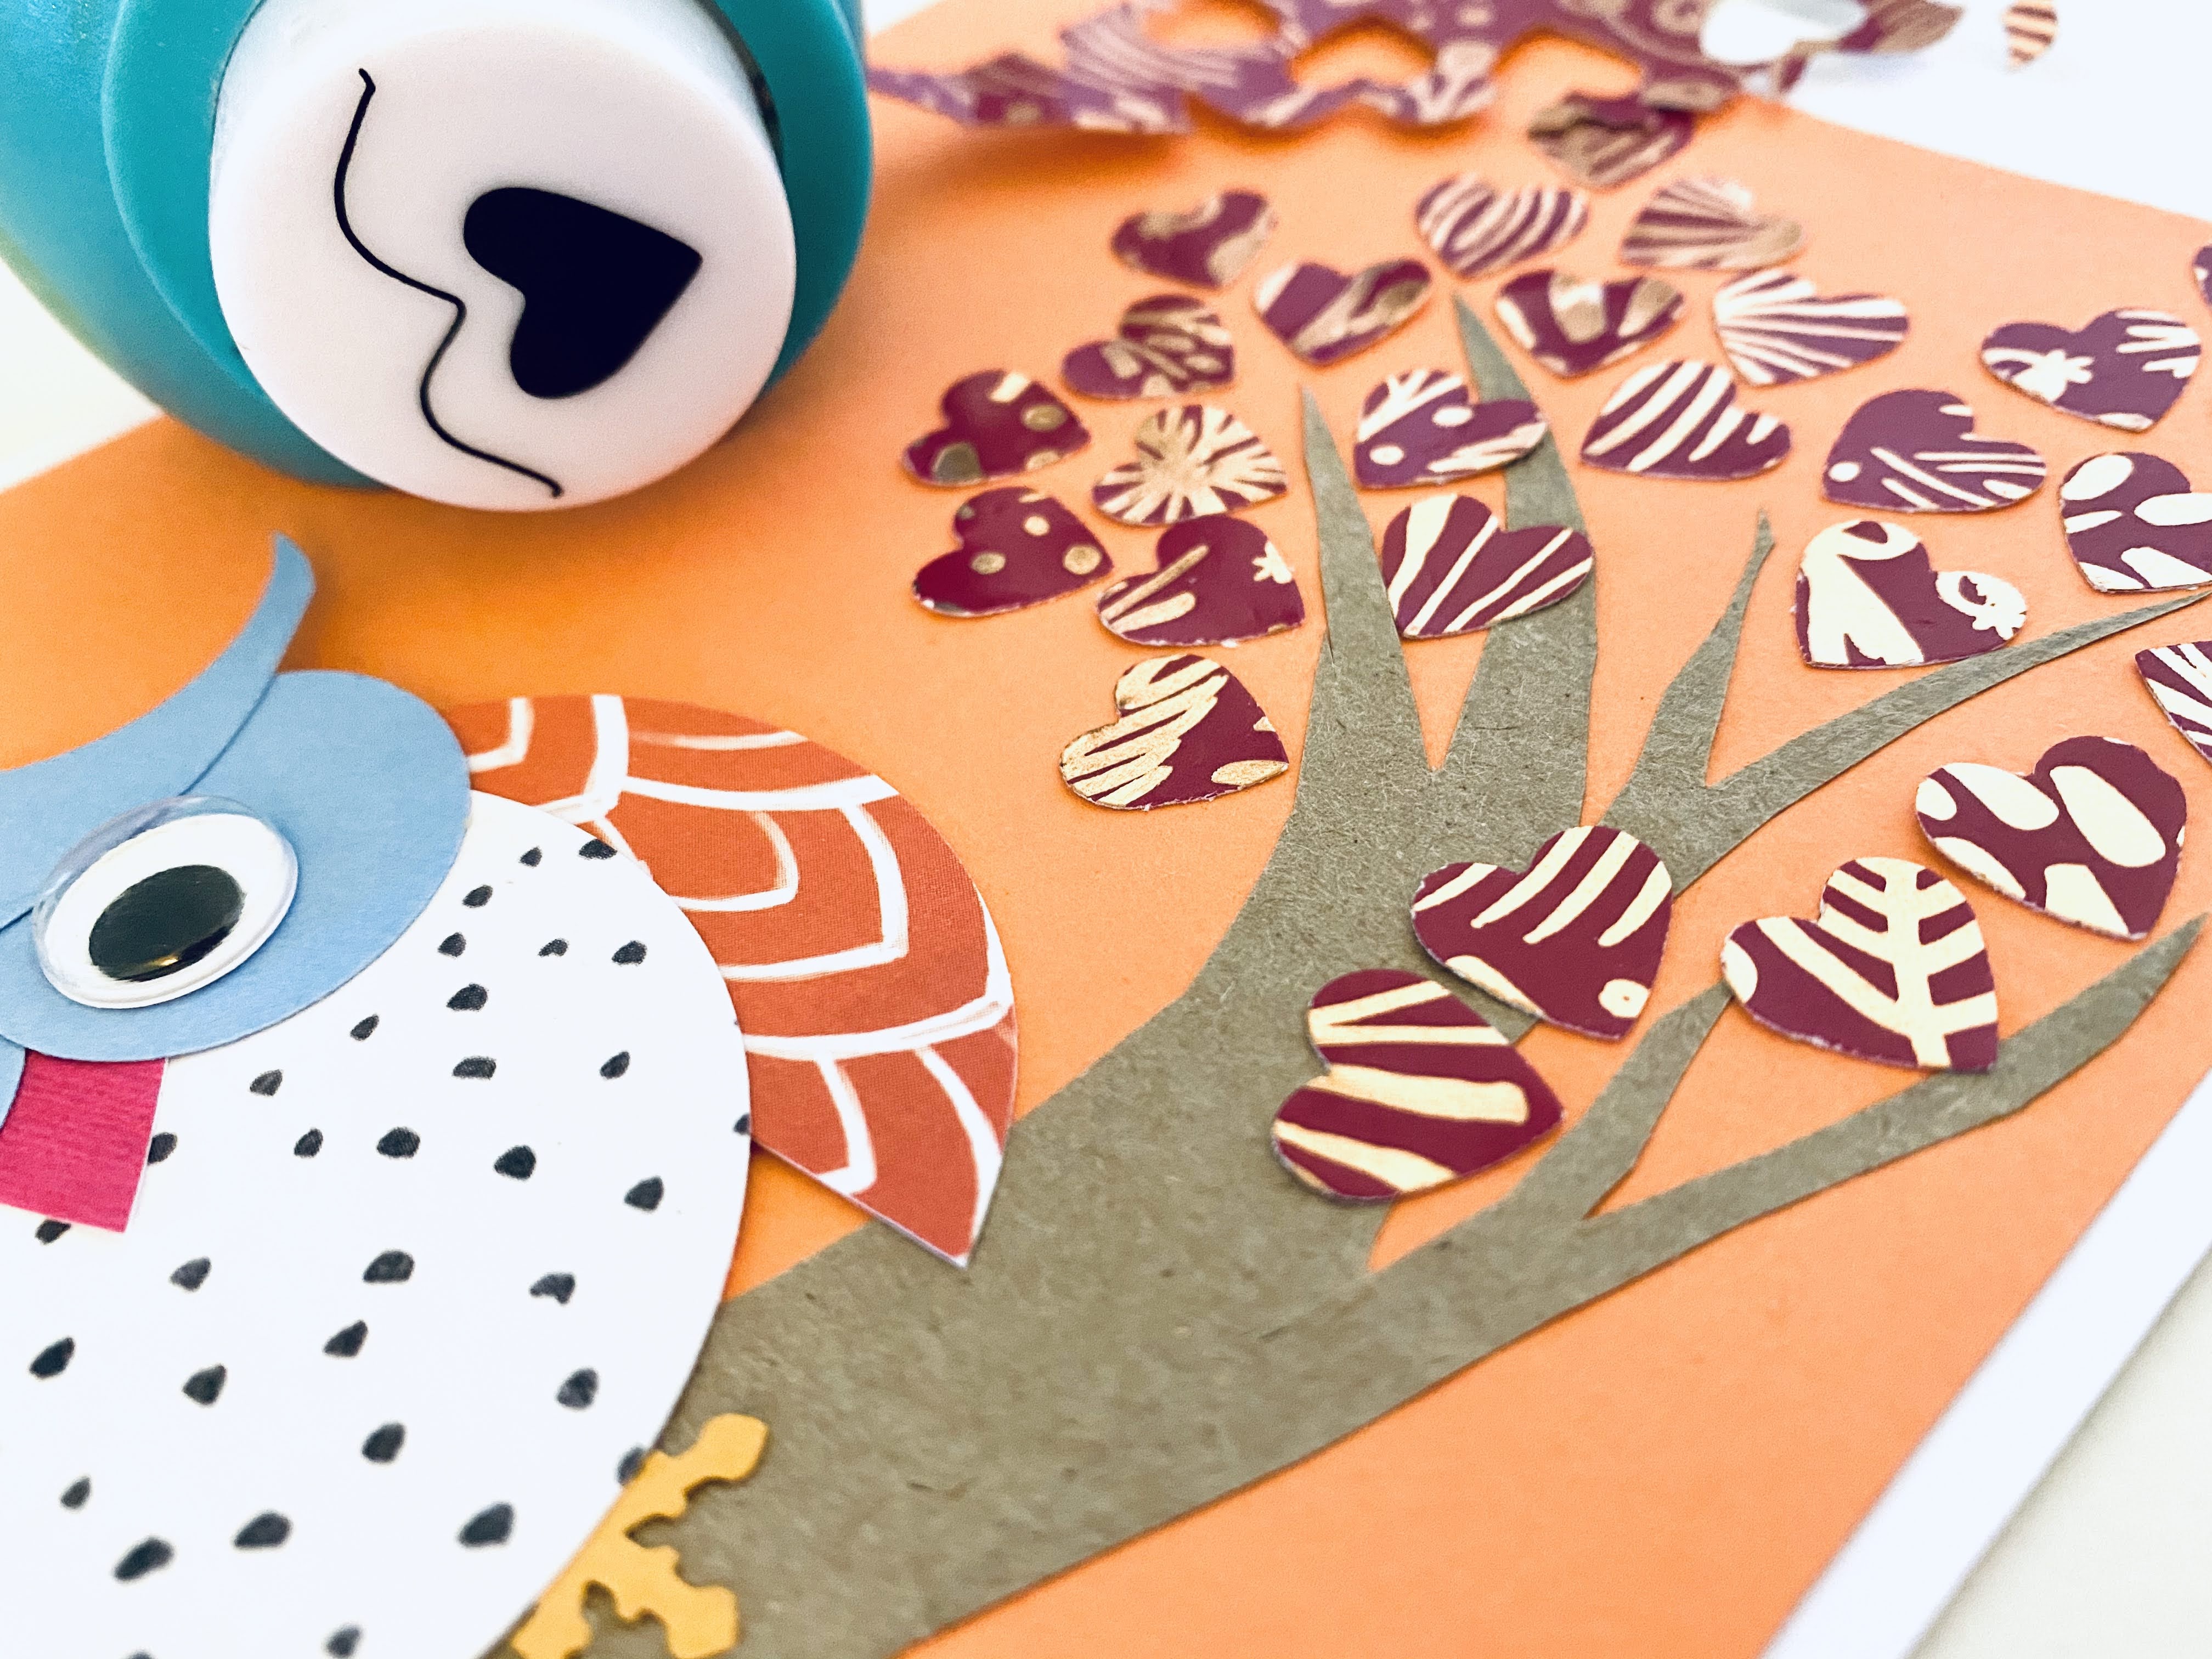
Step 5: Next, we drew a tree with branches on brown paper and cut it out. Here, we just drew the tree trunk and branches out by hand. This does not need to be perfect. Look up some pictures of trees if you need some guidance. This is really a chance to practice your drawing skills!
Step 6: Next, we cut out and glued a 4×6 inch color cardstock to the card. Then we arranged and glued the tree to the cardstock first. We then decided that the owl should be perching on the tree branch. So we arranged (but did not glue) the owl on the main branch.

Step 7: Next, we needed leaves for our tree. So we used a small heart punch to make 20-30 paper heart leaves. We arranged and glued most of these hearts to the smaller branches to fill out the tree. We chose a small magenta blank card we had in our stash. It had gold foil on it. We loved the detail and decided to use it.

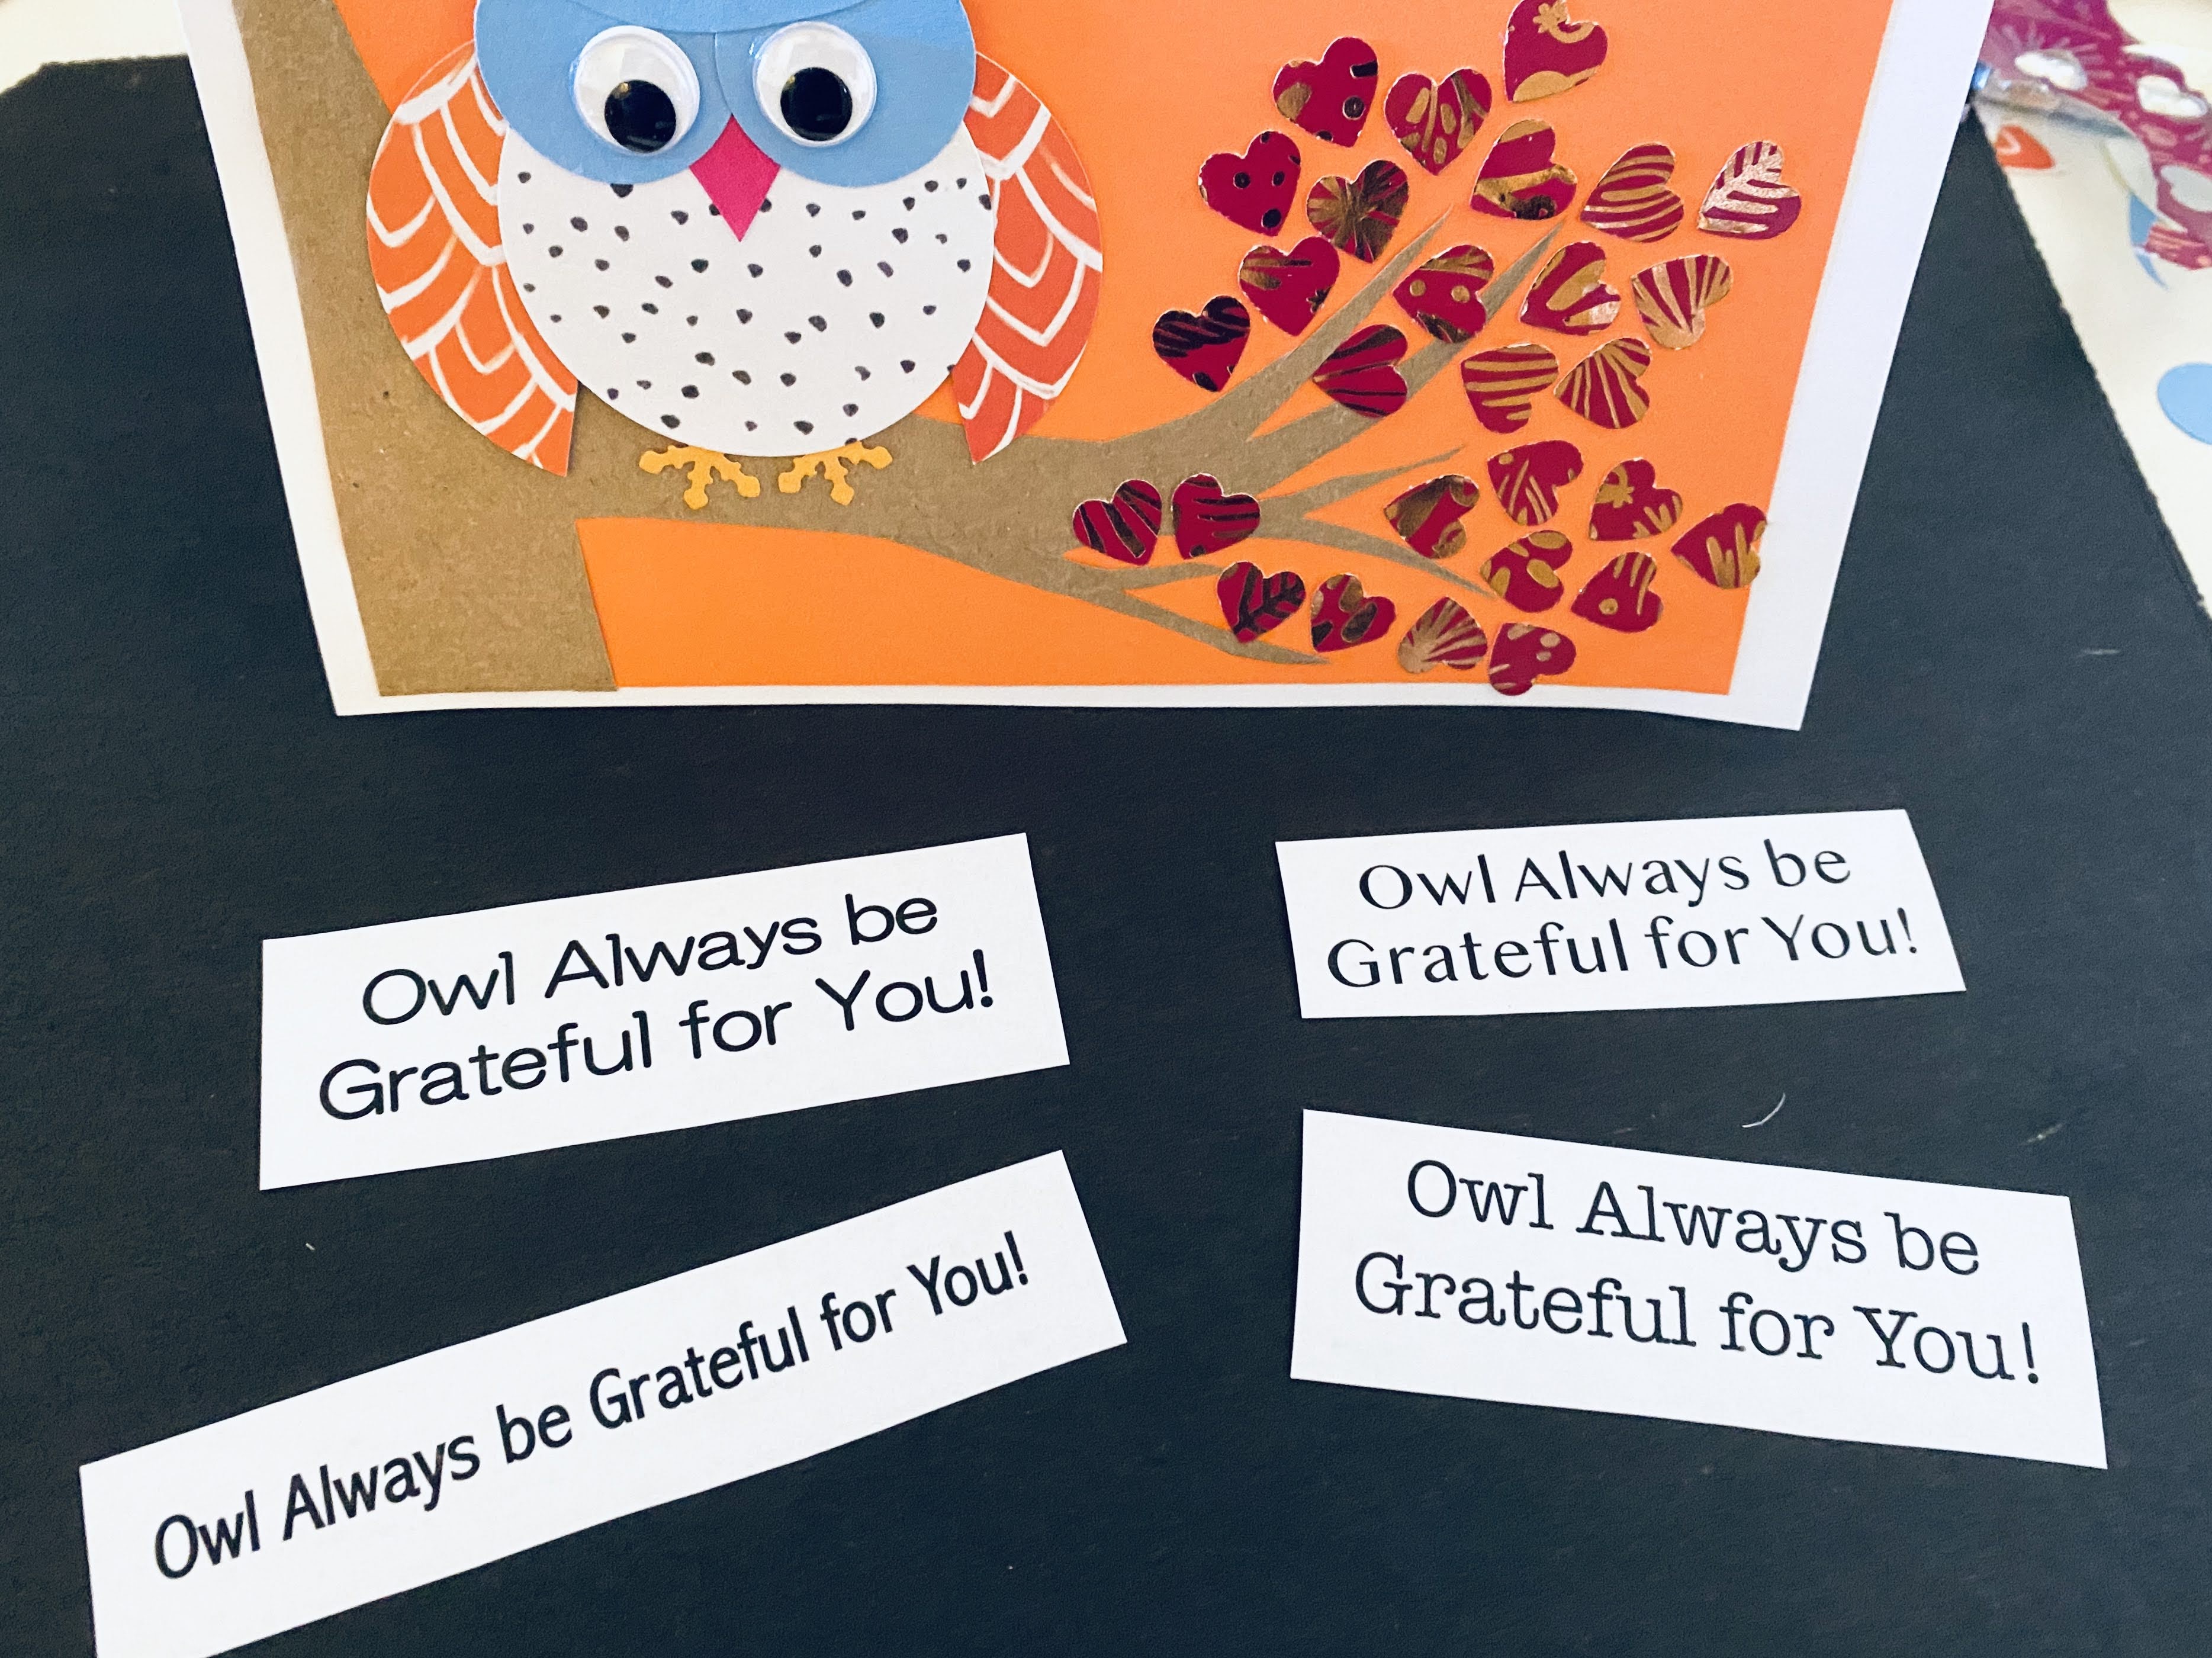
Step 8: We finalized the position of the owl on the tree and glue it. We added a foam adhesive behind the owl to give it some height and dimension to the card.

Step 9: Next, we printed out the “Owl Always Be Grateful For You” sentiment on white paper. After deciding on the proper font, we typed and printed the sentiment and glued it to dark magenta cardstock. We cut that cardstock out and positioned it in the center of the card. We affixed the sentiment to a foam adhesive to add height and also make it stand out on the card.

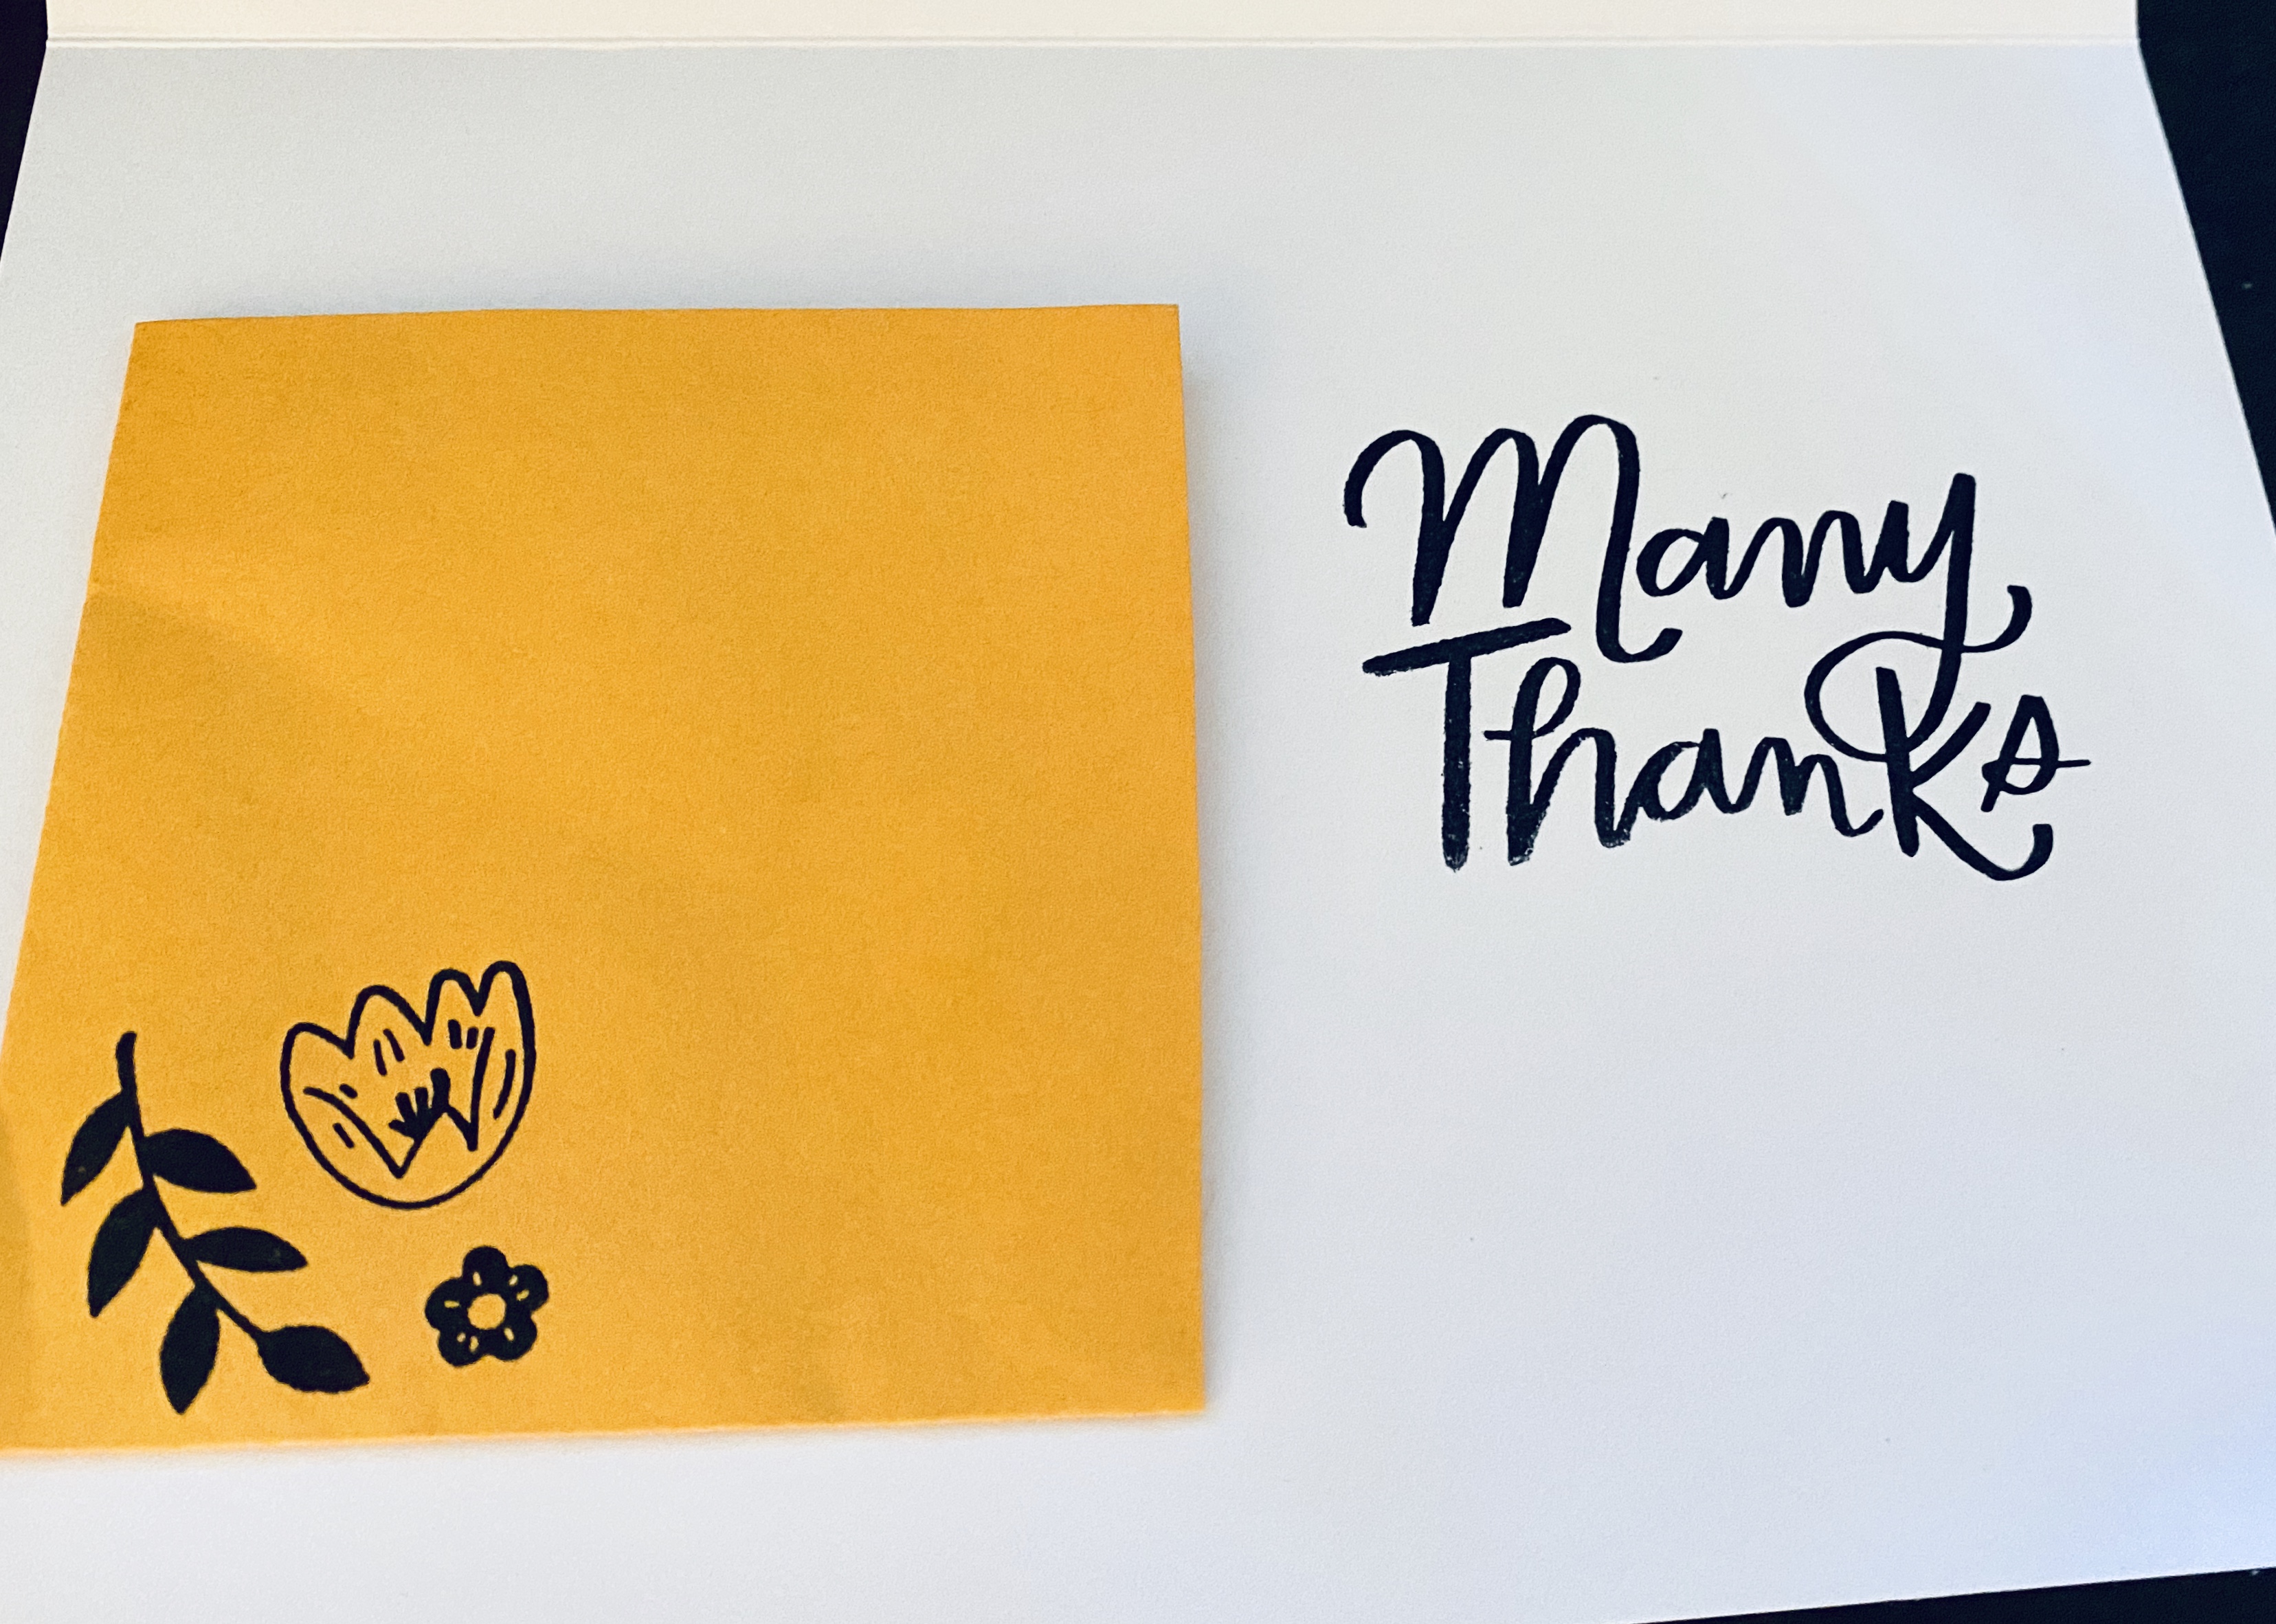
Step 9: Next, we stamped a sentiment inside. We also decided to stamp “Many Thanks” inside the card. I think this stamp is from Recollections (a Michael’s Store purchase). Additionally, we decided to make this a pocket card so you can write your gratitude on separate stationary if you wish. You can then fold the letter up and slip it in the pocket. This is great for people who prefer to write a longer thank you letter.
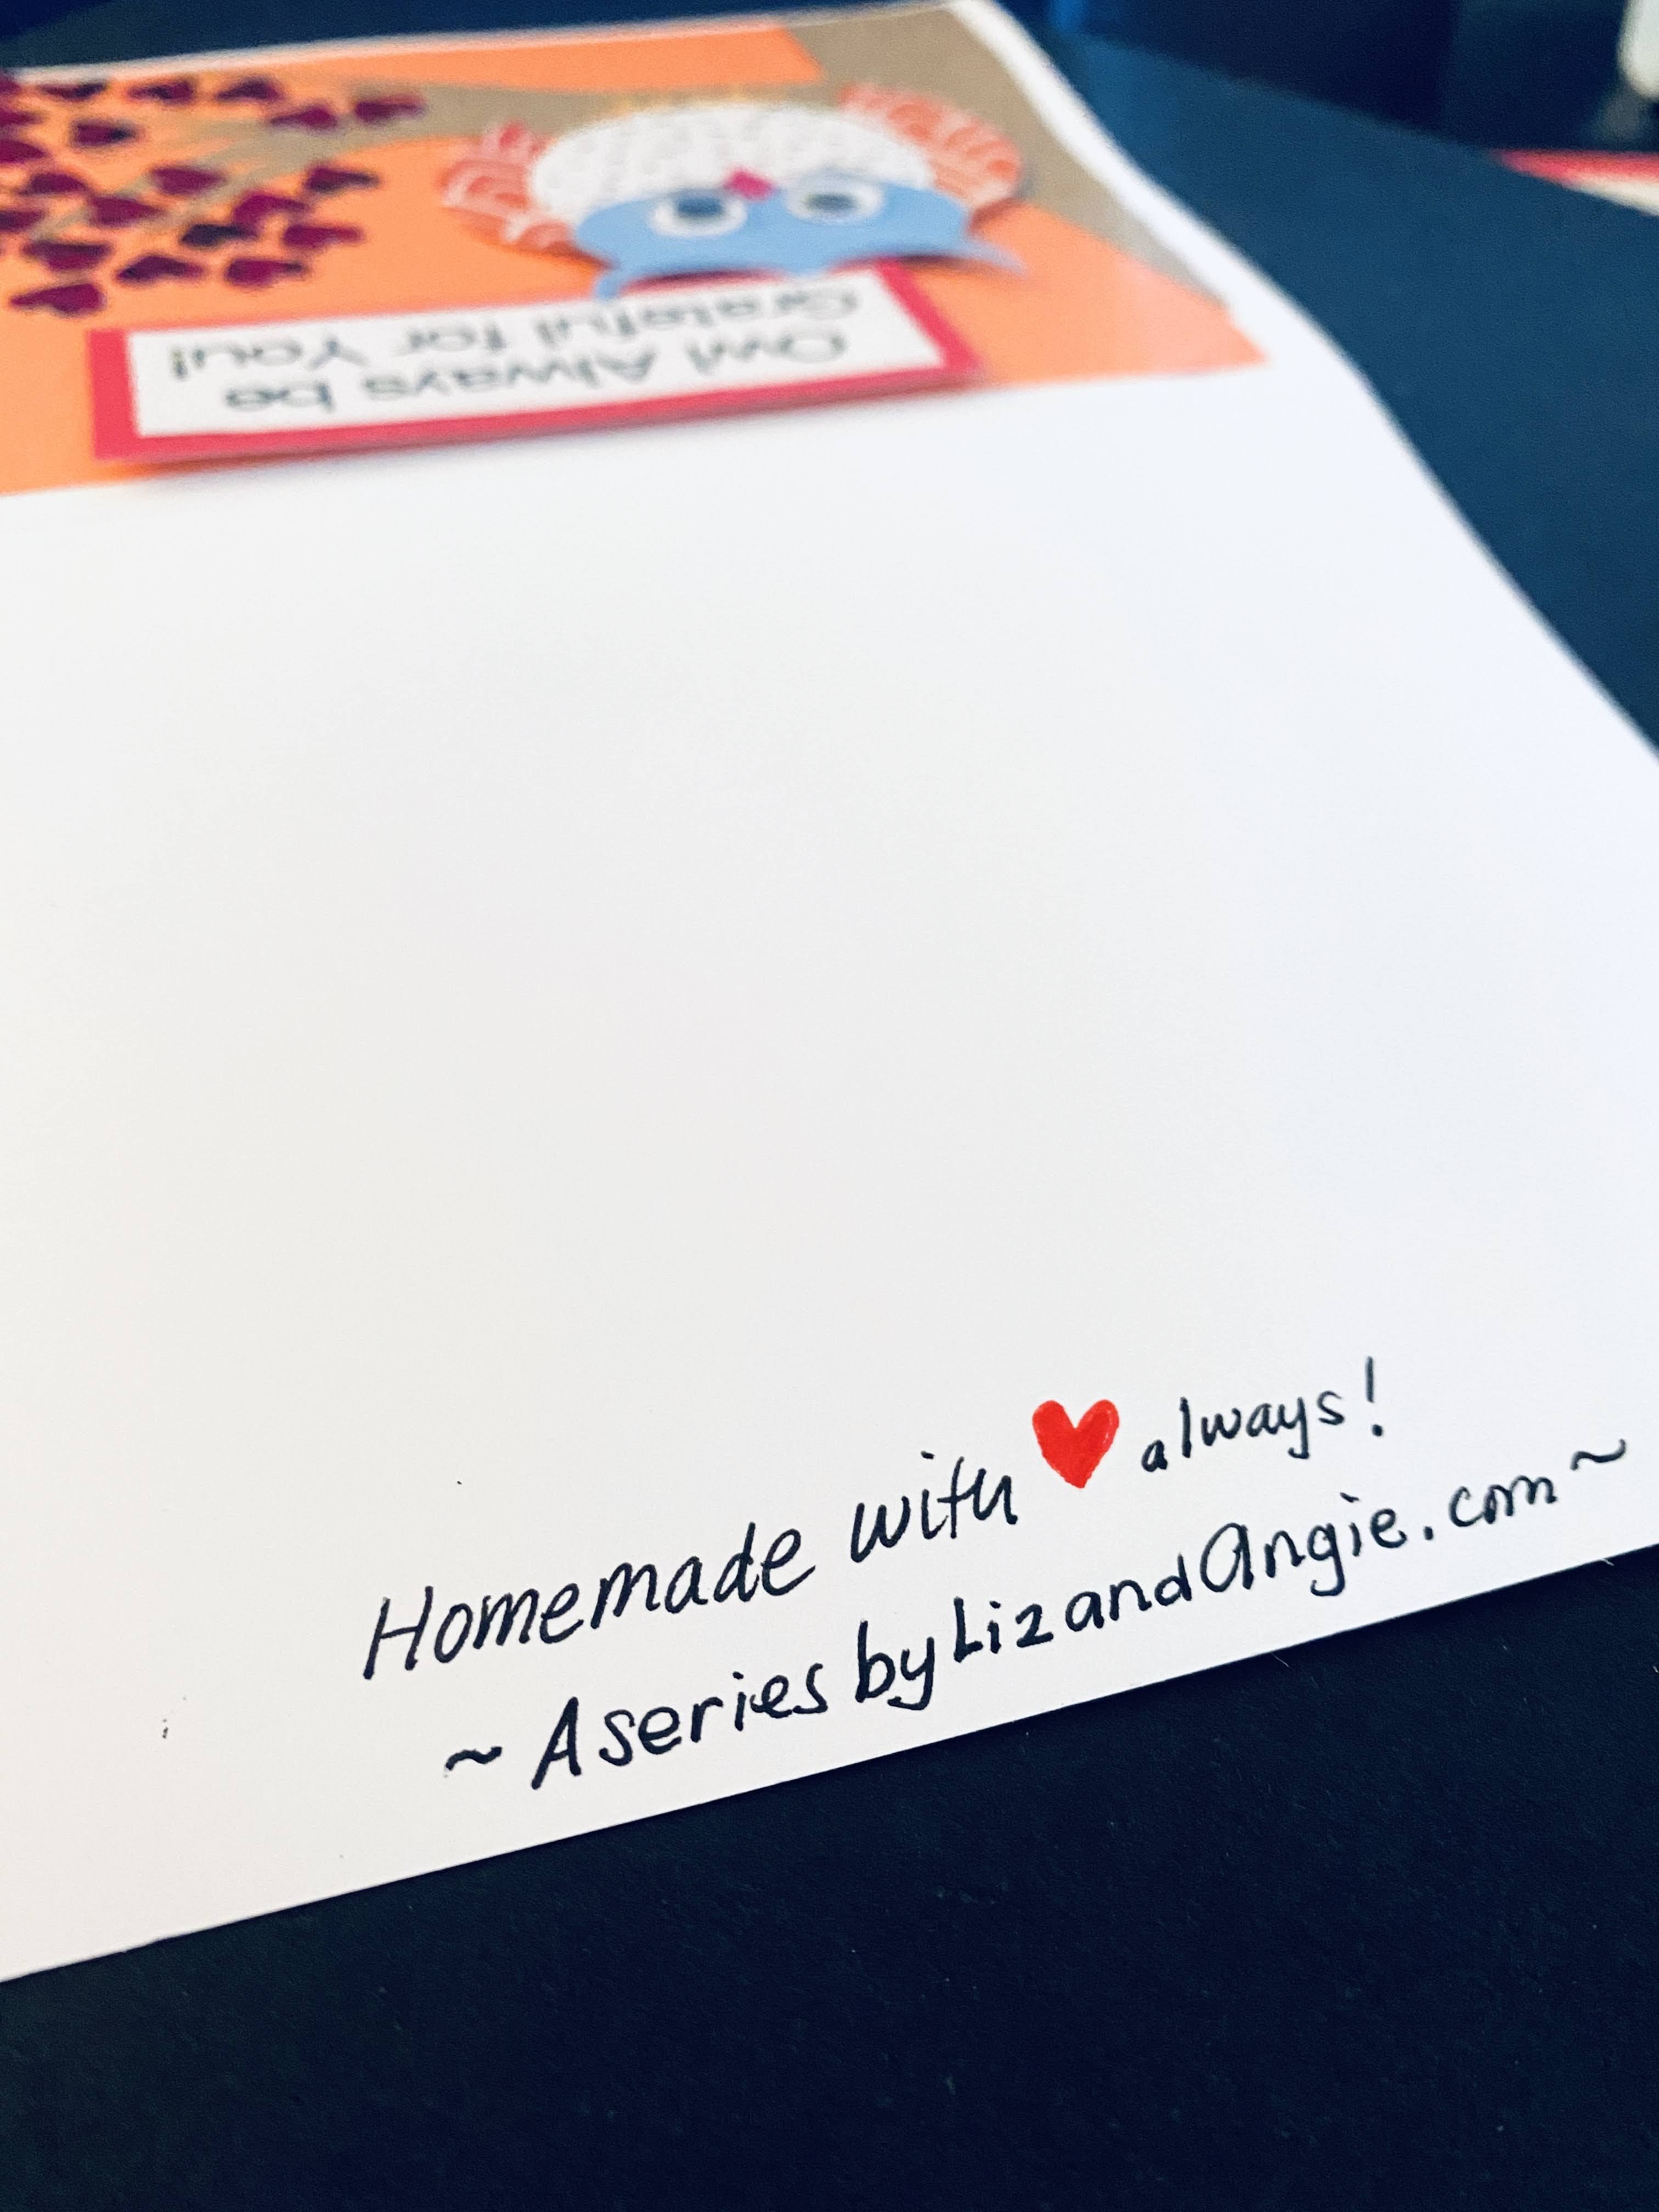
Step 10: Add a “Made With Love” greeting on the back of the card. Because, why not? Let the recipient know it was made only with love, and nothing less.

How cute is this? An owl card for teachers, mentors, and people who have inspired you. We enjoyed making this card and we hope you enjoy trying it out.
What other animal-themed cards should we make next?
