
“Learn to bend and not break” is advice from Married for Life: Inspirations from those married for 50 years or more published by Hallmark. Liz picked up the book from a local CVS store more than 5 years ago. And this past weekend, we put the book to good use when we made this this pink and gold iridescent bridal shower card.

On Saturday, a colleague of ours was having a “drive through” bridal party. COVID-19 has definitely made it an interesting time for those who are engaged and getting married. But love seems to survive it all, pandemic or not. The human need for community and celebration just doesn’t stop. It just gets creative.
So for this card project, we wanted stick to a pink theme. The bride-to-be’s shower invitation included airy, feminine and pink icons and colors. How can we make this card also feminine and memorable?
If you are interested in making this, all you would need is:
- Origami paper
- Marriage advice (search the internet or scriptures on love)
- Crafting Glue
- Foam adhesives
- A 5×7 card
- White or cream paper to print the marriage advice on
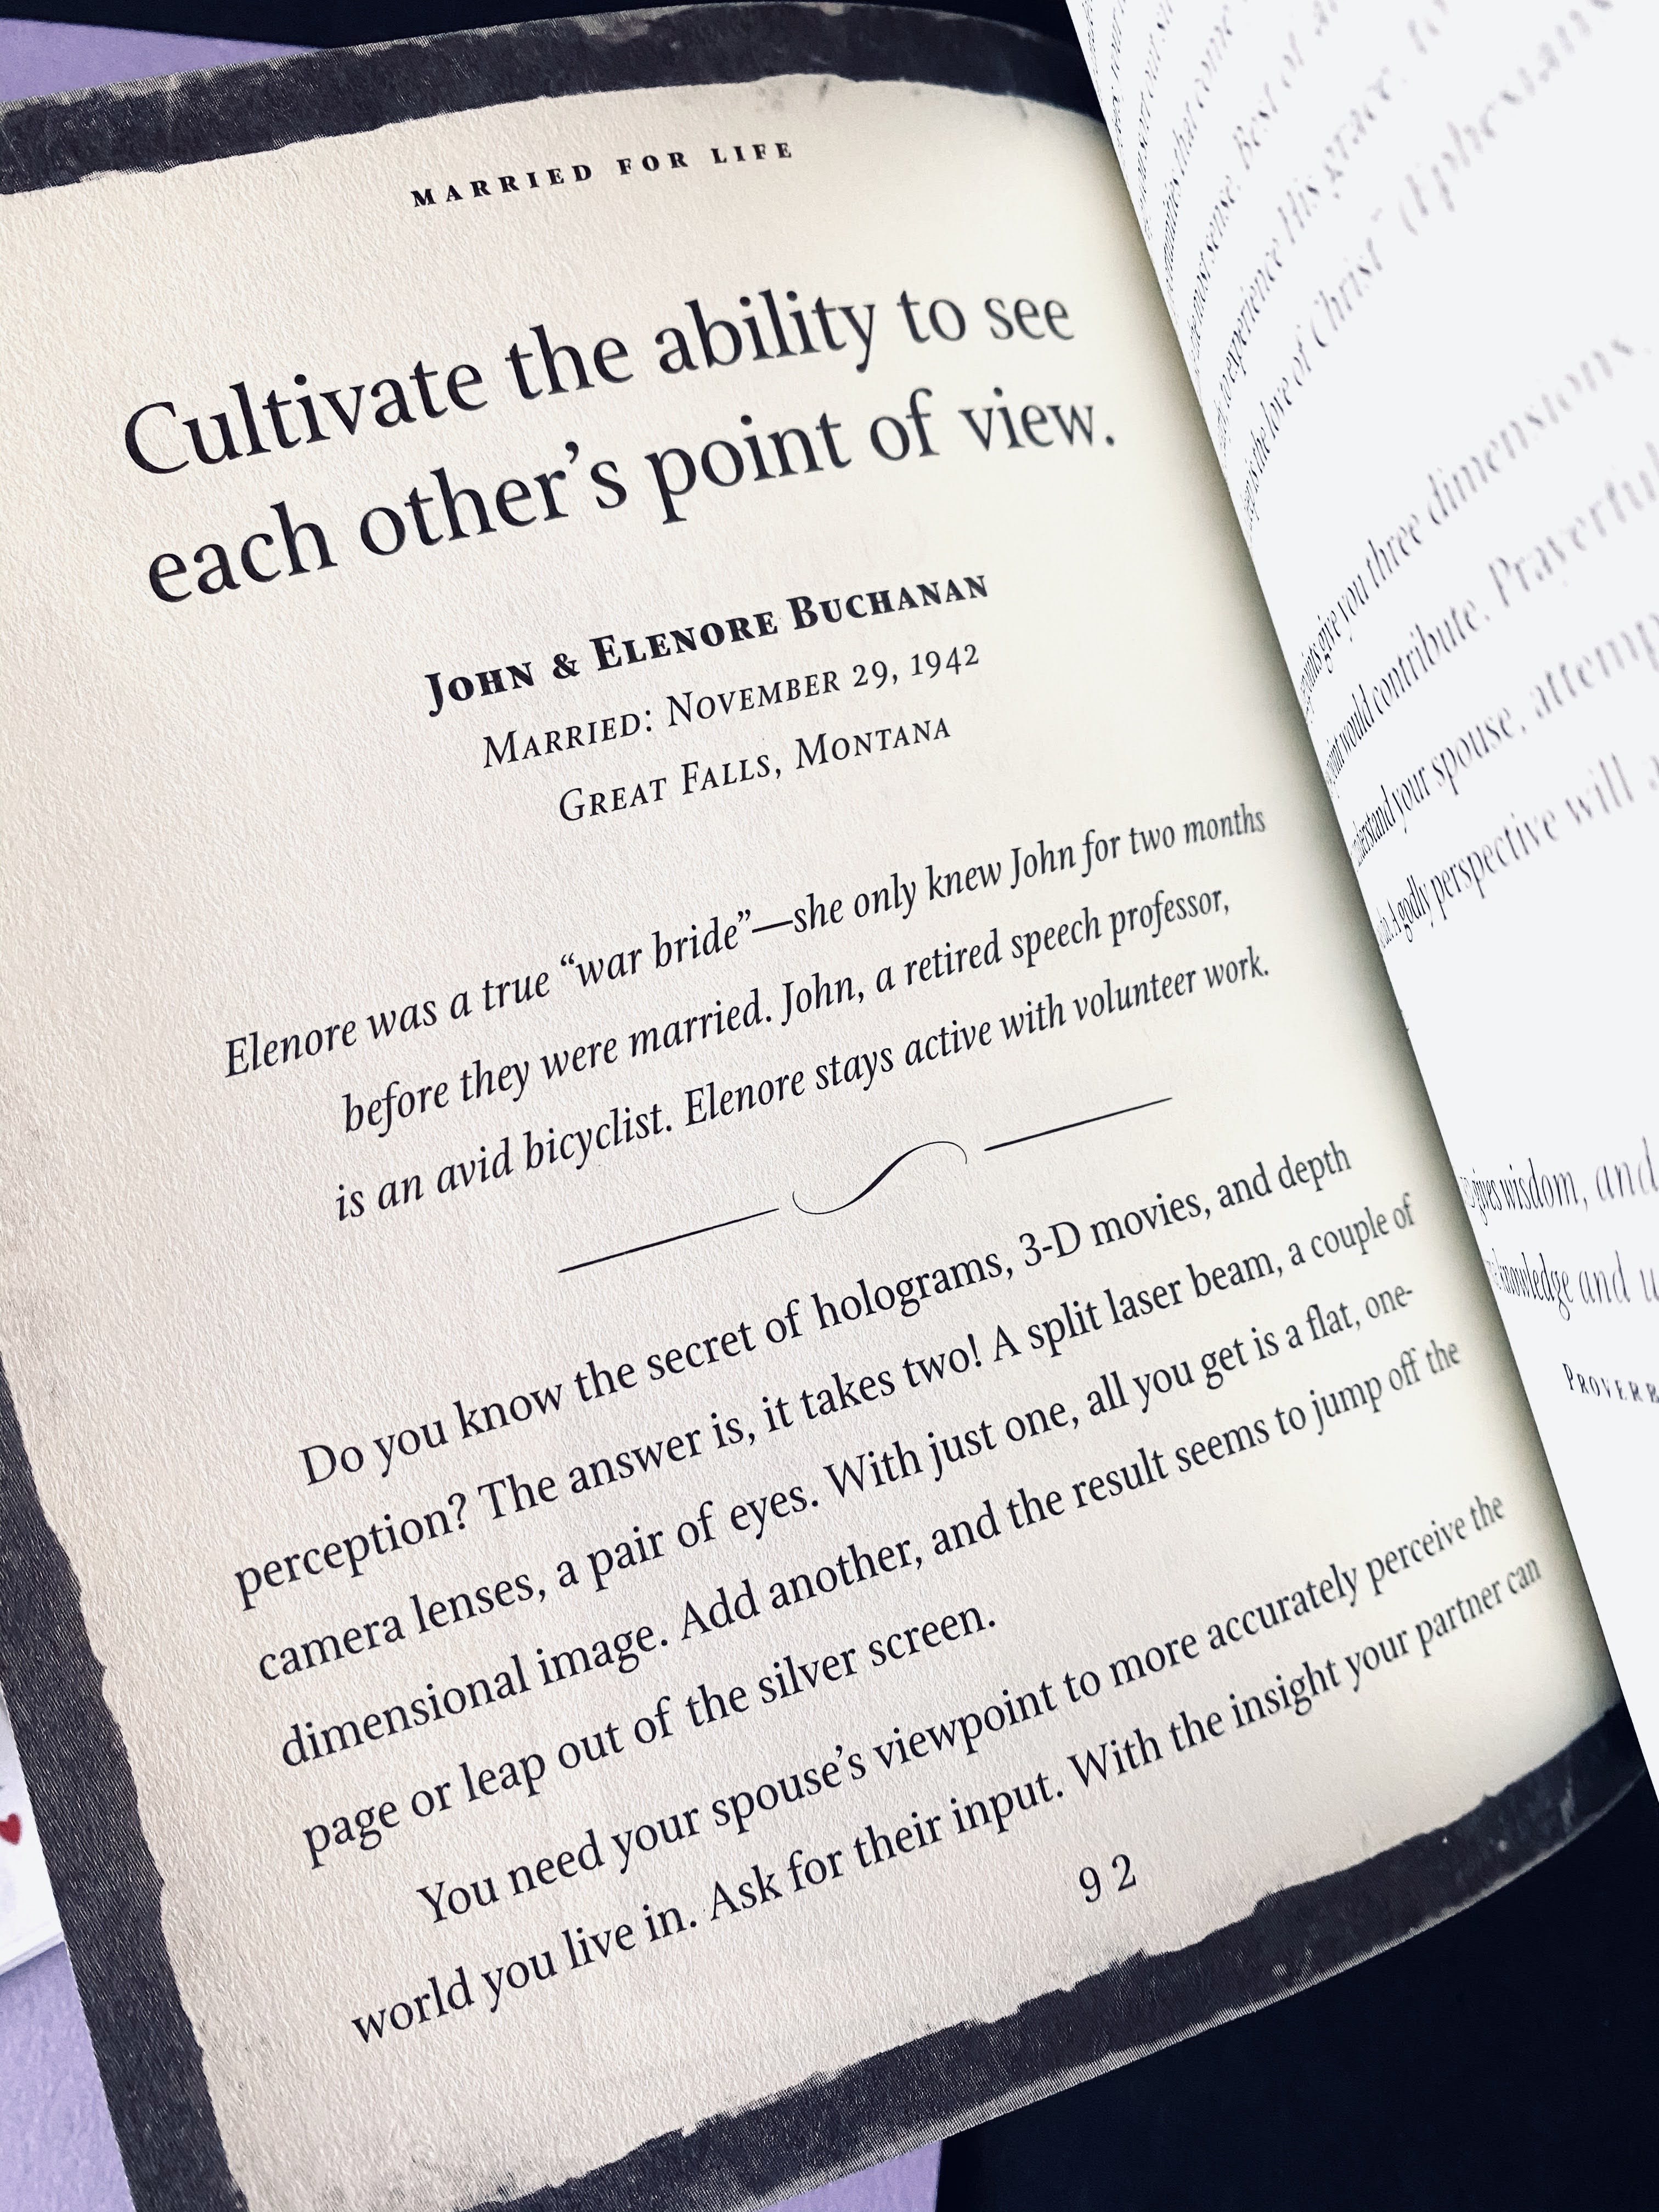
The first thing we did was open up the Hallmark book, Married for Life: Inspirations from those married for 50 years or more. We loved the advice from this book. It included both scripture from the bible but also your practical daily tips oh how to live and love your spouse.
When one is about to get married, many family and friends are naturally inclined to give advice. We wanted to gently reflect this same tradition on our card.
Liz decided she would type as many tips as possible and use the text as the card’s background. You can do this on any word processing program you own. Liz, in fact, used Microsoft PowerPoint so she can easily manipulate the text and images. Use any tool at your disposal (design software or not!) We used the “American Typewriter” font and lightened it to a charcoal gray. We also inserted tiny red hearts as spacing between each tip.
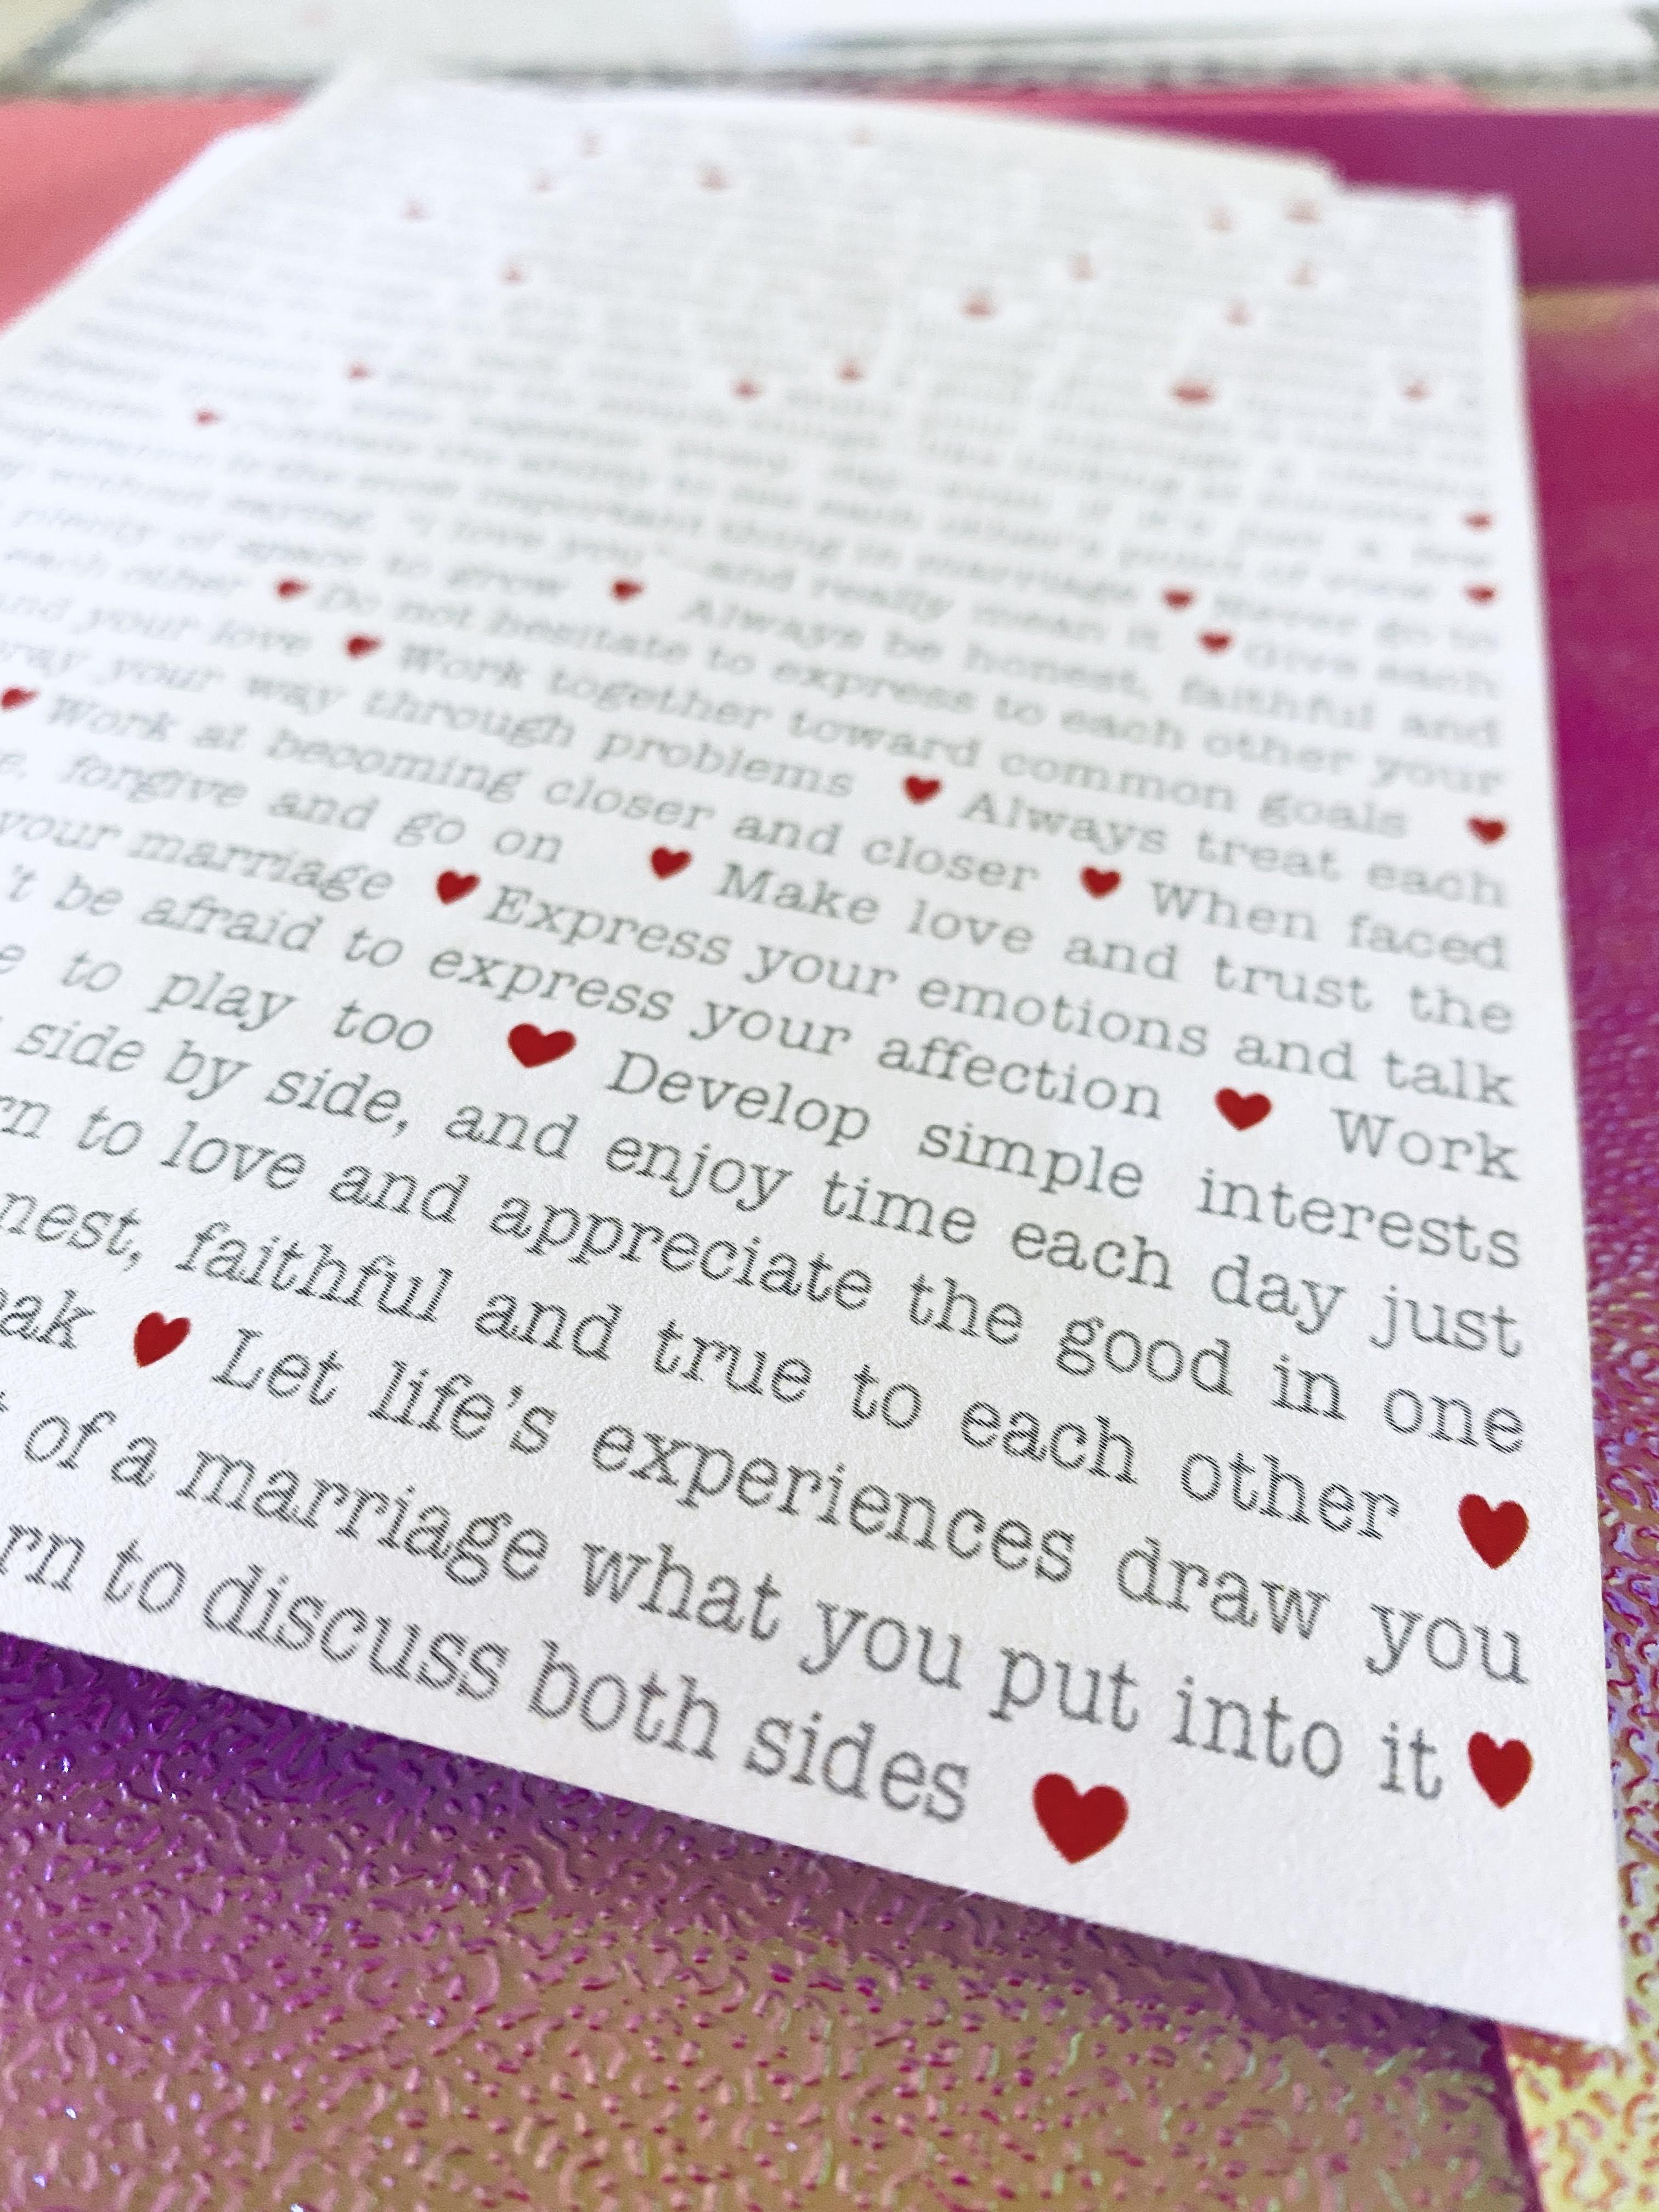
Next, we printed and glued this background text to a white 5 x 7 inch card. I believe we used fabric glue to avoid warping on the card (we are still on the hunt for the perfect crafting glue!)
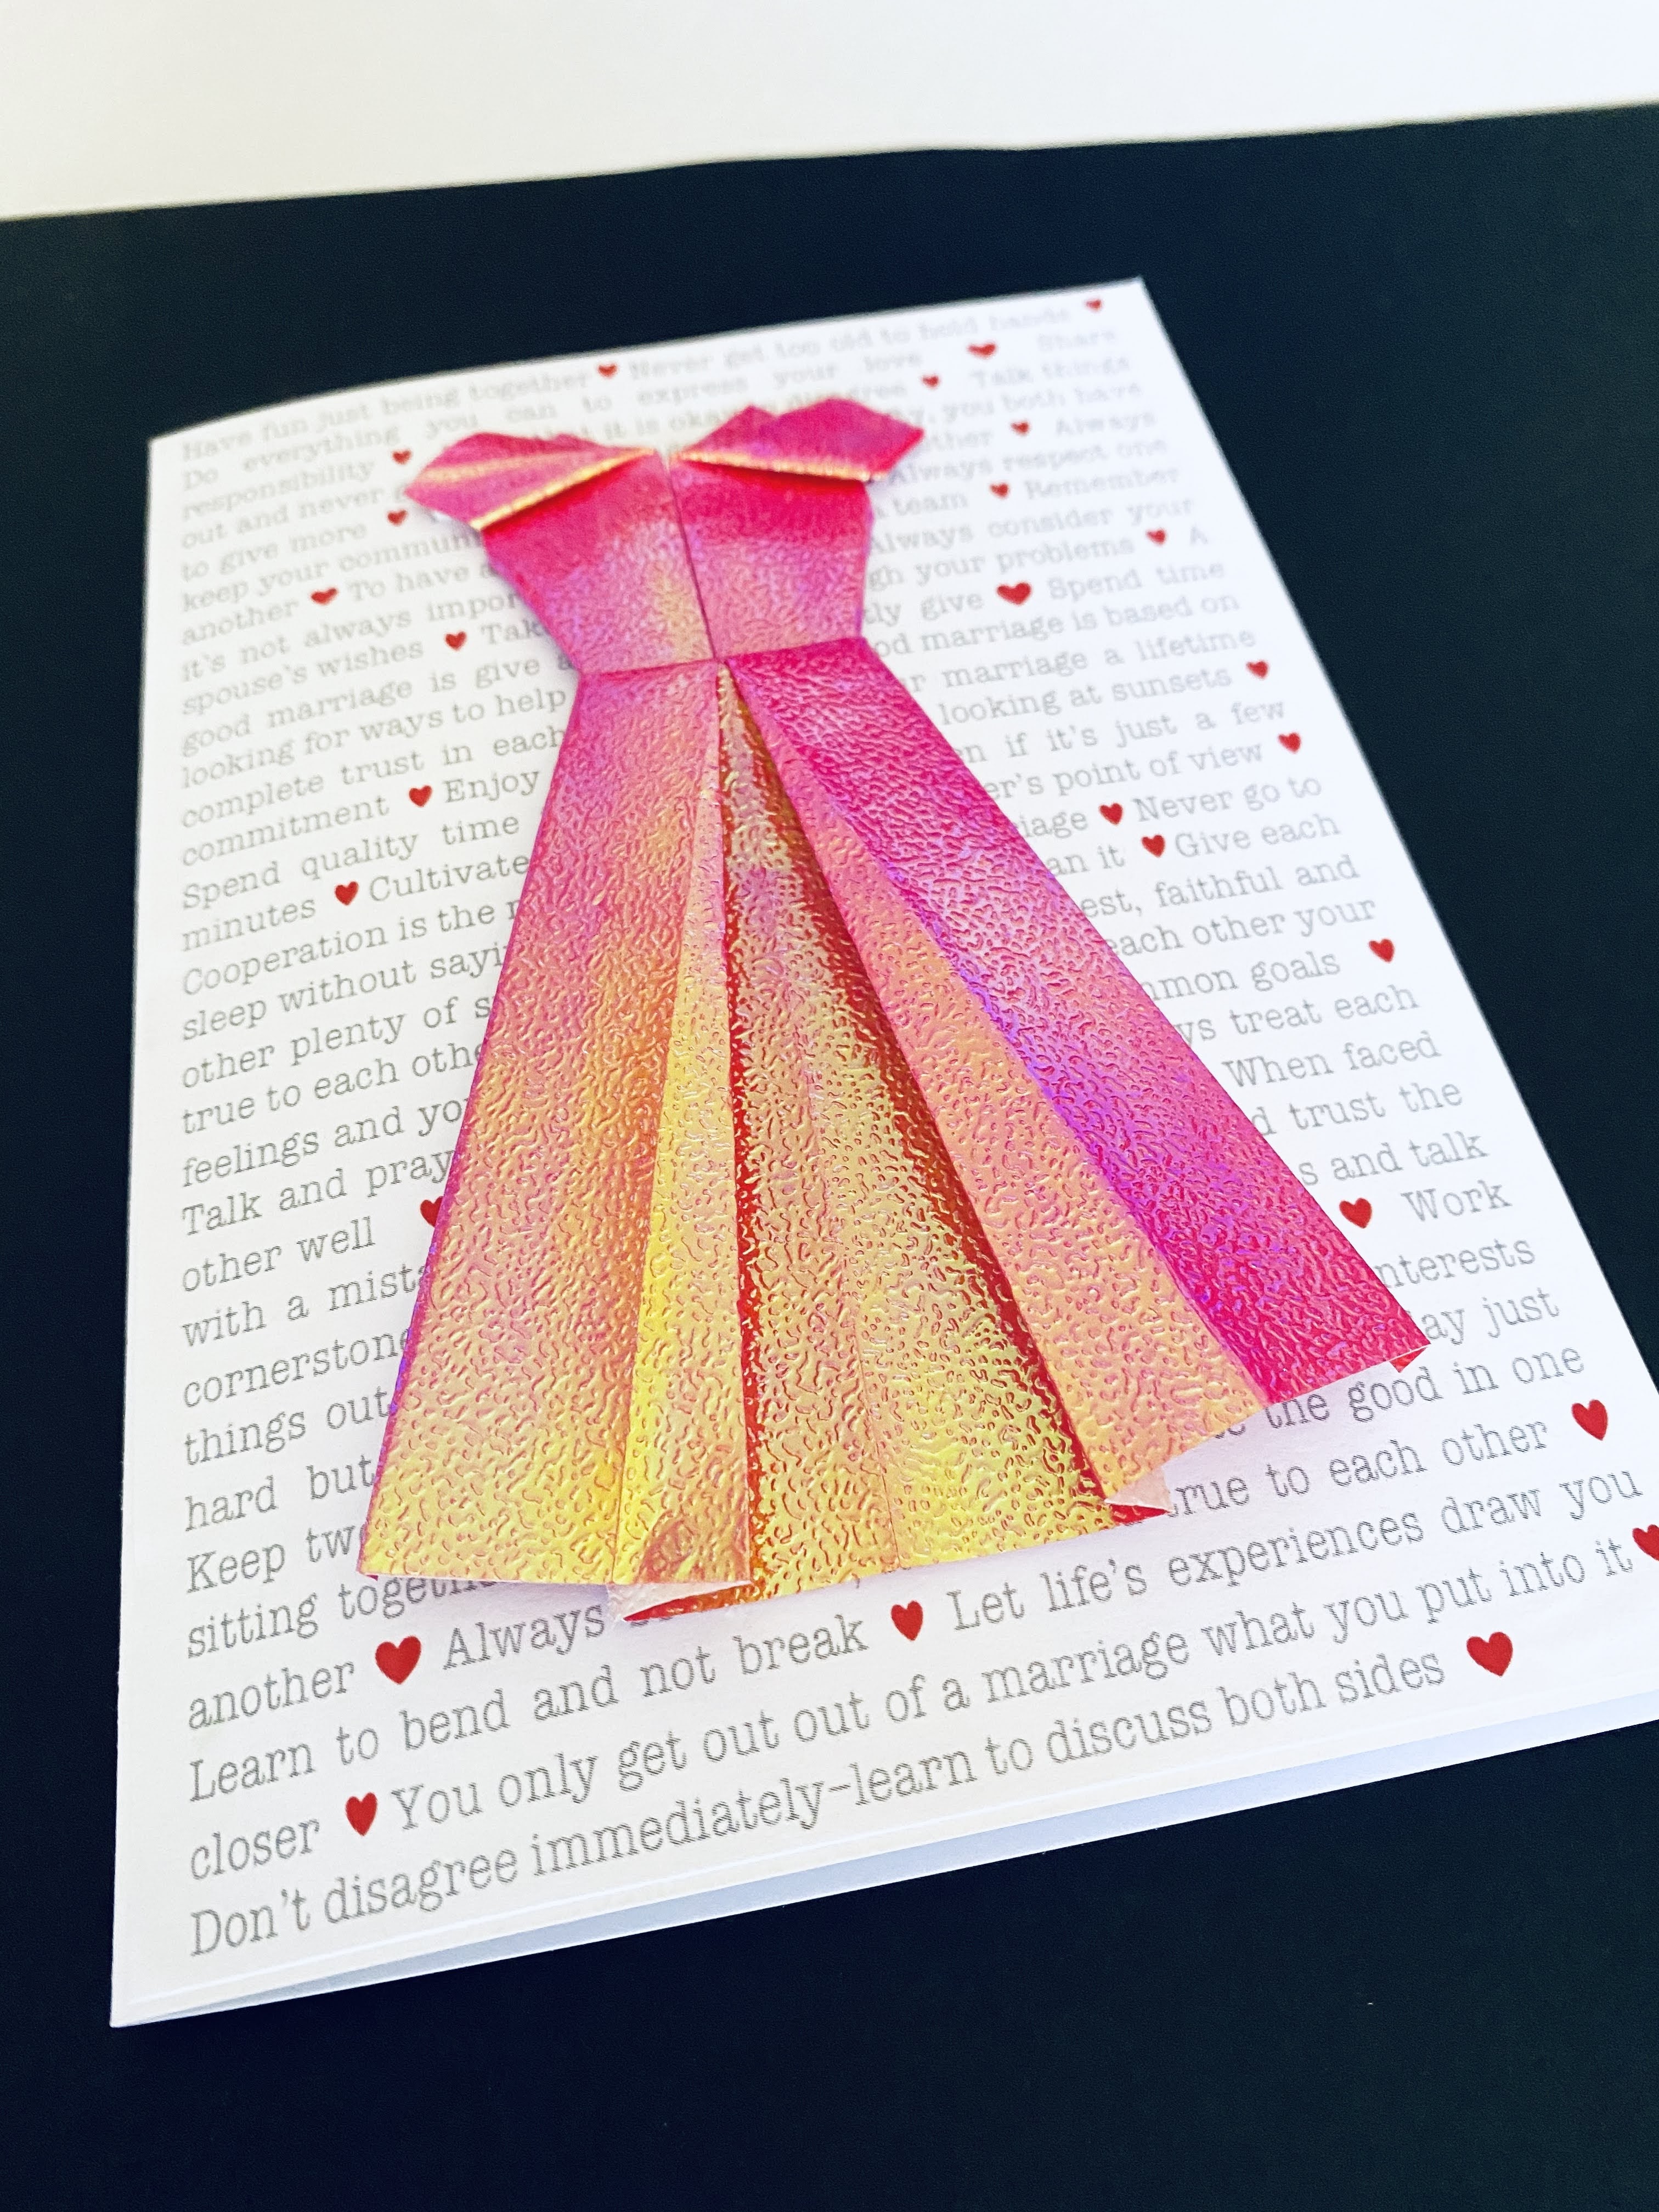
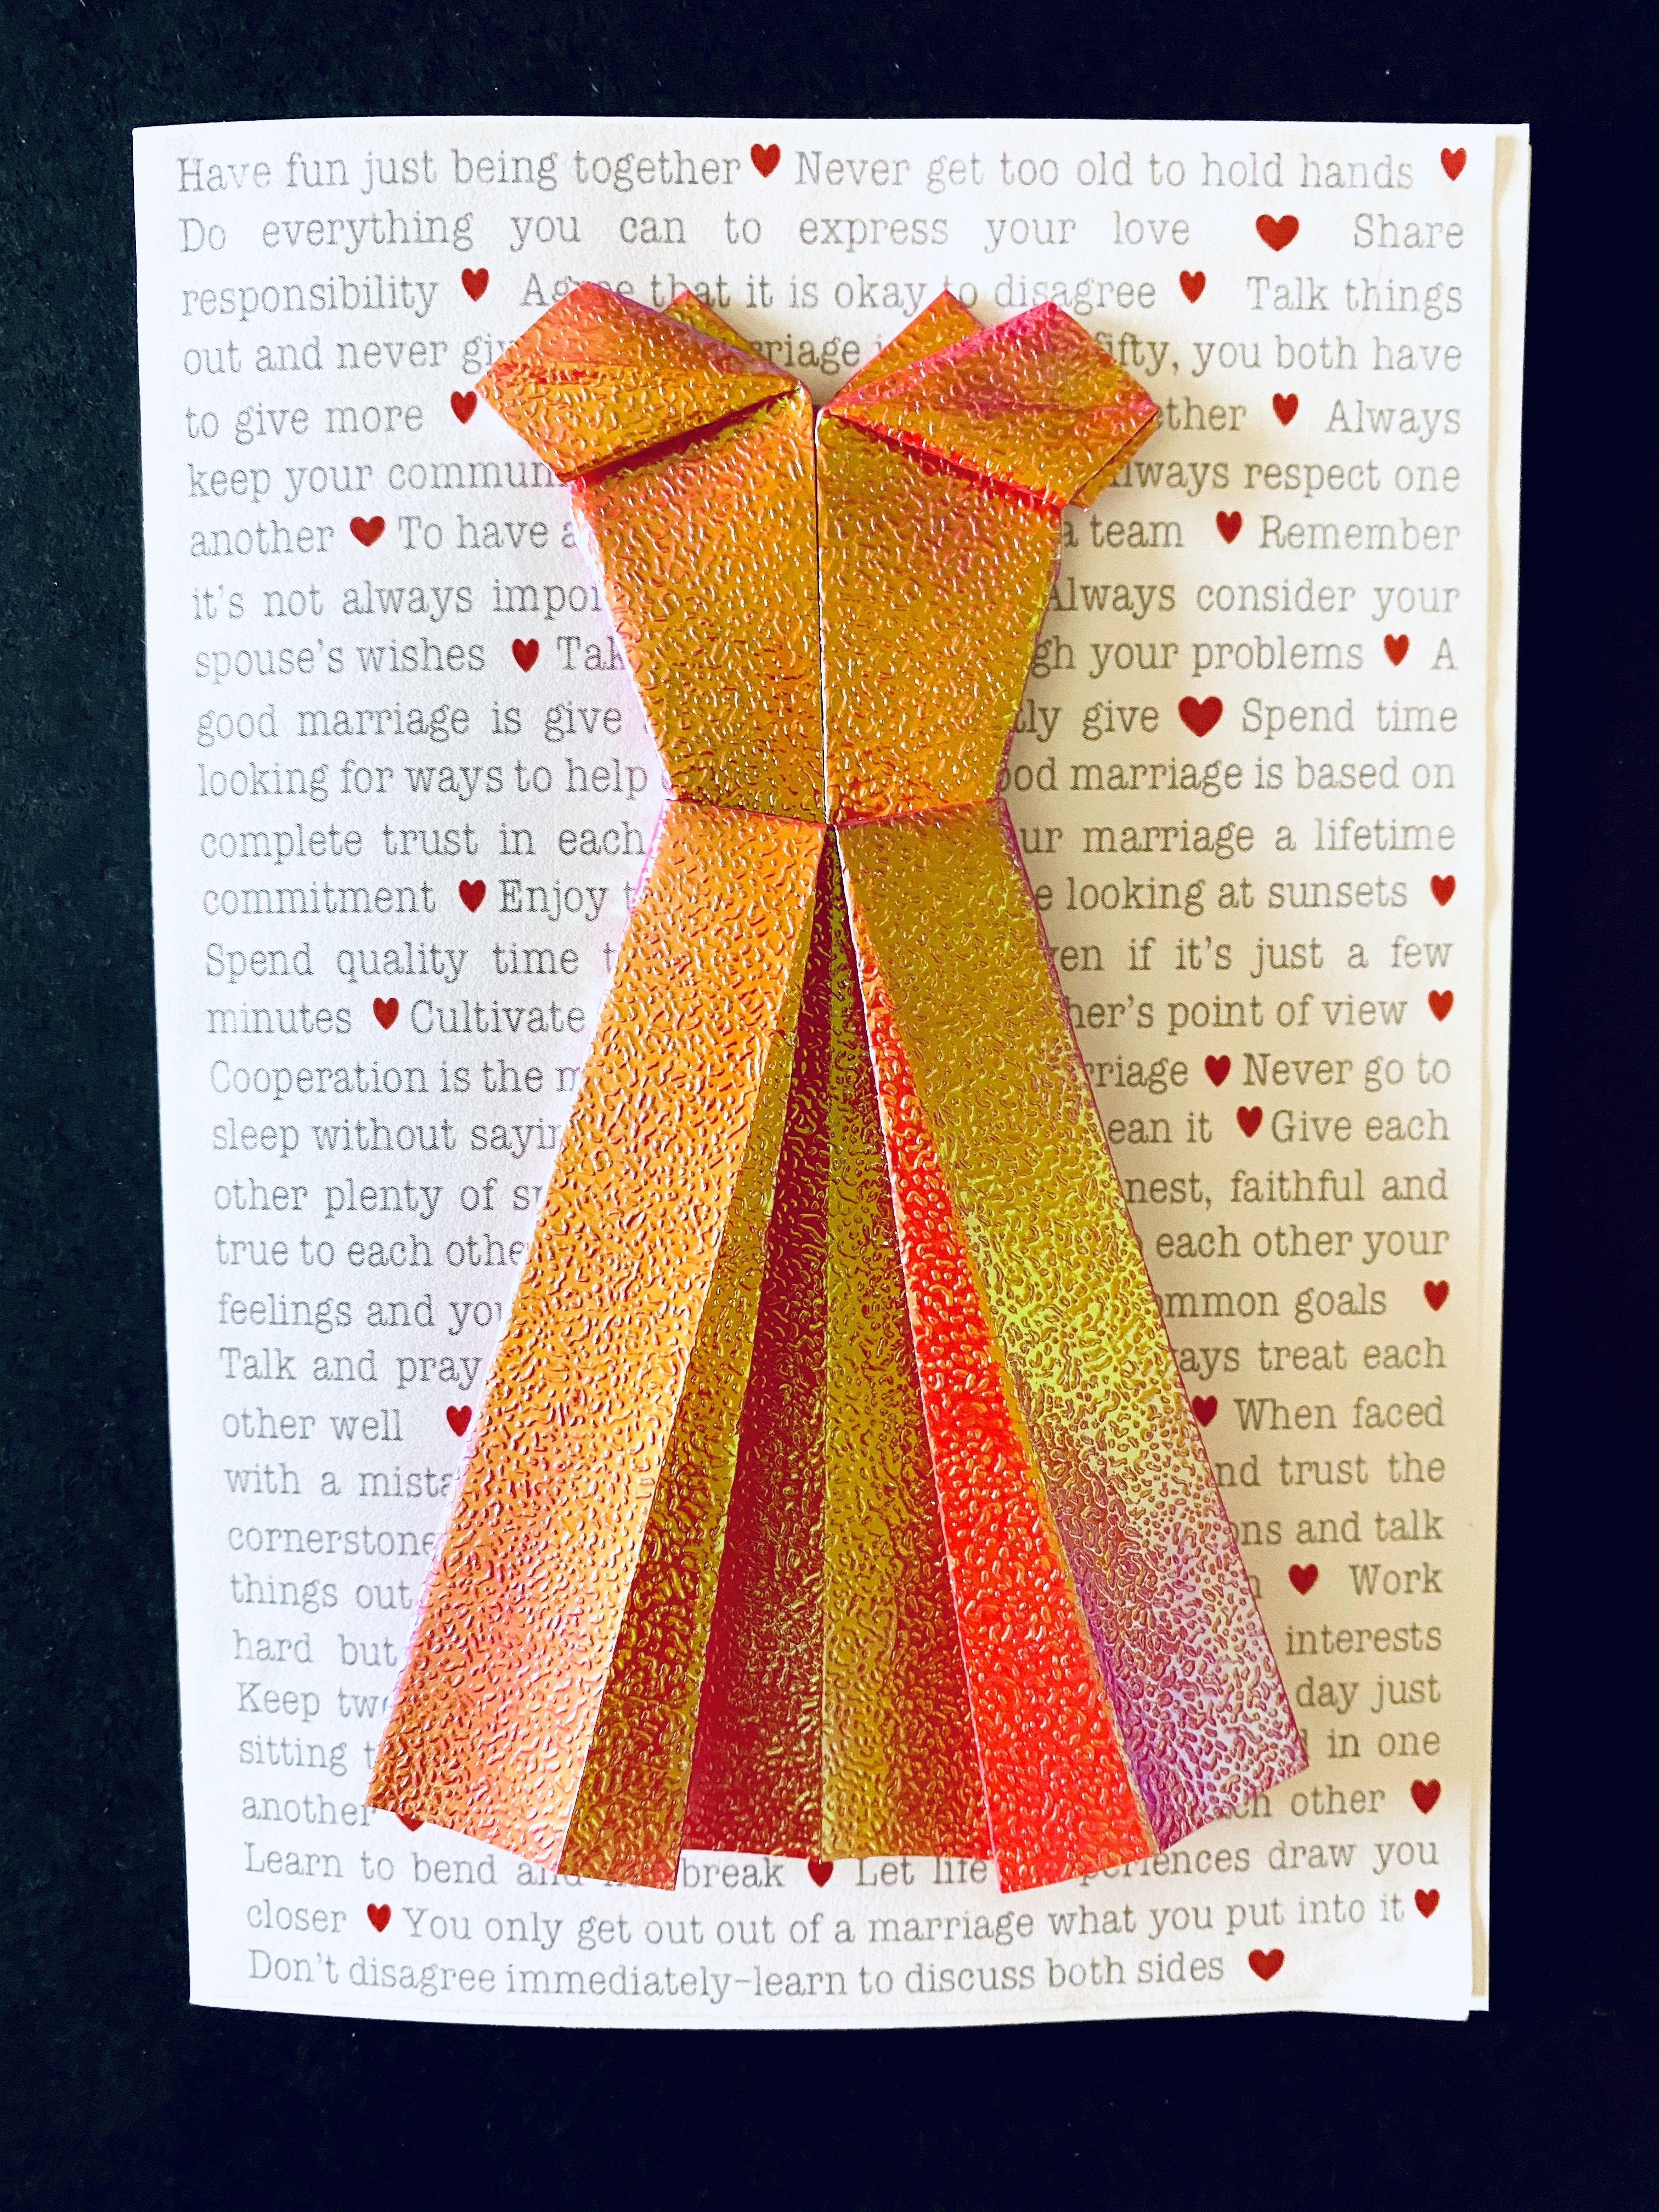
Next, we wanted to add a beautiful three-dimensional object as the centerpiece of the card. We also knew that we wanted to keep it simple. In the end, we chose to make an elegant dress using iridescent pink origami paper. When held to the light, it transforms and shimmers into golds and oranges. With its hues of pink, the paper looks like the perfect sunset.
We cut the paper down to a square size. Using 7 x 7 or 6 x 6 inches of paper will work.
To make the dress, we watched this Princess Dress tutorial on Youtube,【折り紙】プリンセス達のドレス Princess dress.

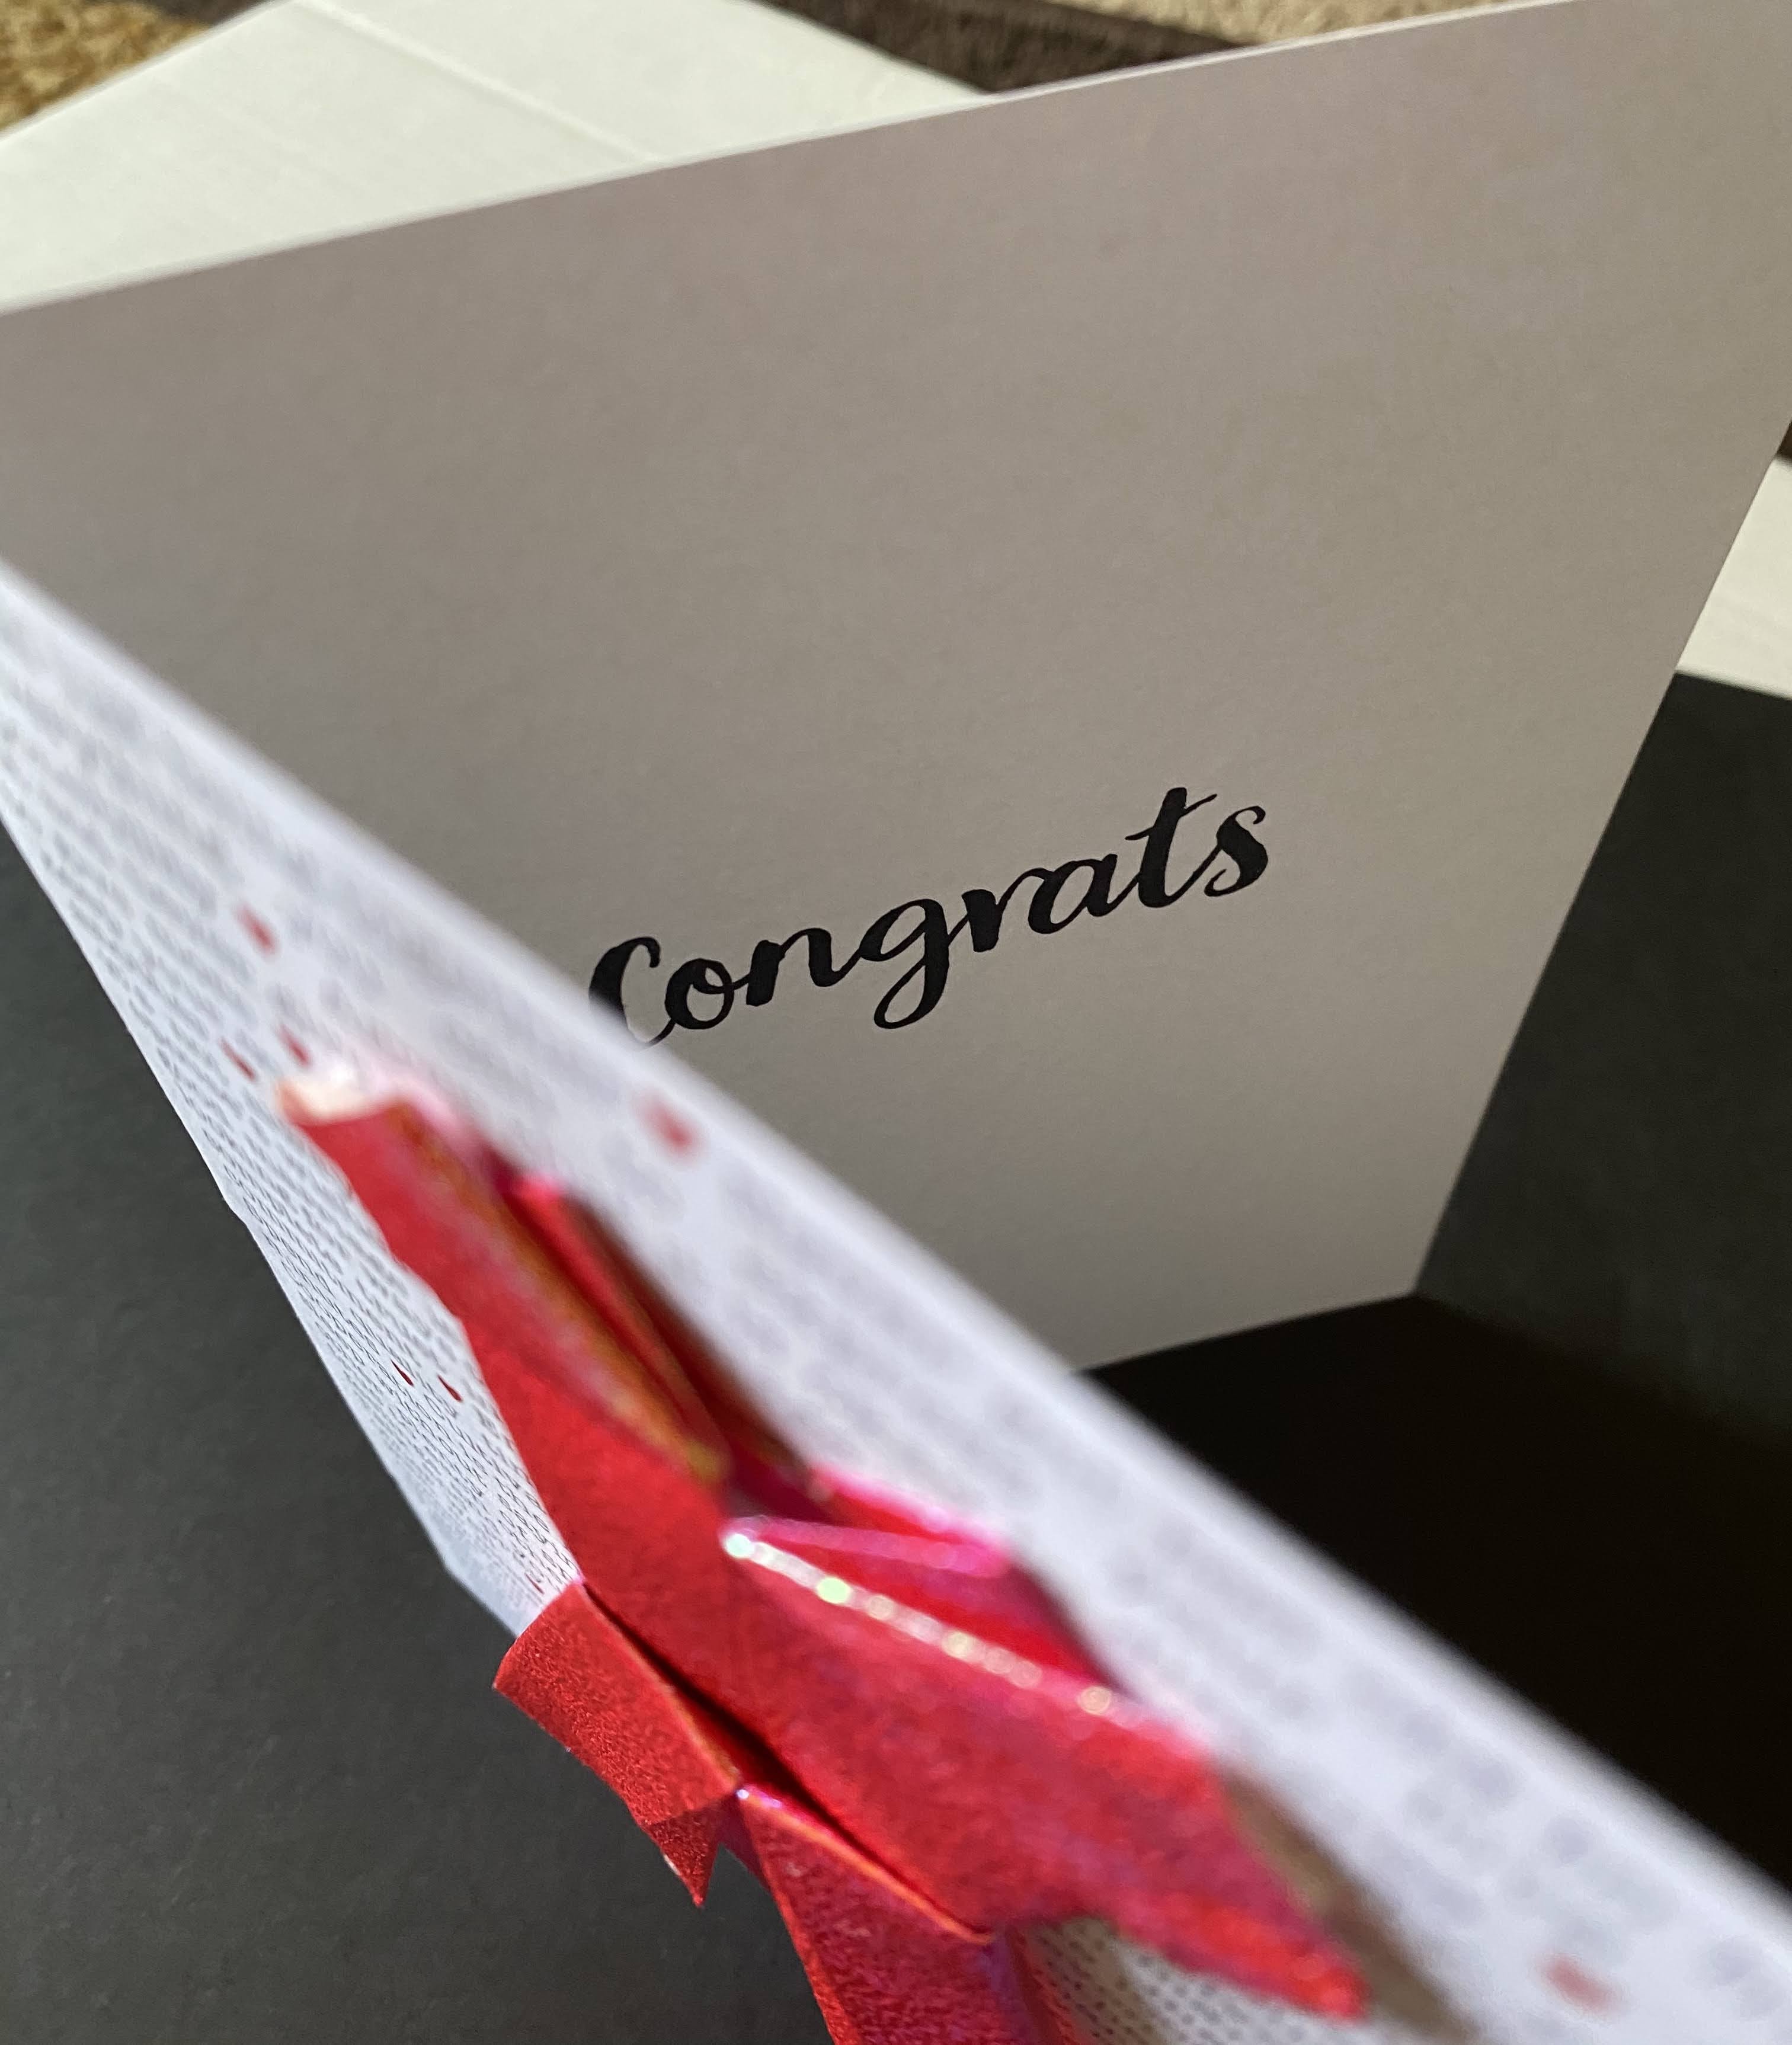
Next, we added a simple “Congrats” sentiment from a Recollections stamping set purchased from Michael’s.

Here is the card from one perspective. The dress appears magenta from this angle.
Here is the final card. Oh, and before we forget to mention this, we added foam adhesives behind the top and middle part of the dress to give the dress a little bit of height and further dimension. It still fits in an envelope. From this perspective (and lighting) the dress turns from pink to various golds and oranges. The perfect dress to ride off in the sunset…happily ever after.
Have you ever used origami as part of your card project?
We wish you much love this week (and every week!)
